I will be posting information on the following techniques over the next few weeks. Tutorials and projects will follow by the end of next month when my maternity leave start and I have some more time to make the projects and take photo's. So if you have or know about a blog or website that specialize in any one of these let me know and I will add a link to it in that specific section
Stamping
Decoupage
Die Cutting
Embossing
Iris Folding
Quiling
Spirelli
Tea Bag Folding
Paper Pricking
Lace
Peel Offs
Scrapbooking
Using Sketches for both Card Making and Scrapbooking.
Making the most of your craft CD's

Friday, 25 September 2009
Choosing Adhesives
Please note this list is not complete and many more adhesive products are available. Adhesives, or glues, are an essential component of paper craft. Choosing and using the correct adhesive for the job in hand is vitally important to achieve the correct result. Different types of adhesive are required for particular purposes, no one adhesive does the job for all sticking requirements. In many cases adhesive choice comes down to personal preference. I will be adding Pictures and links to this later.
To cover all your crafting needs, you will need, one adhesive from each of the groups below
Dry adhesives
This group of adhesives are a craft box must have as they are quick and easy to use, nonmessy and in most, cases, give an instant bond like :
Double-sided tape
tape on a roll that is sticky on both sides. Available in different widths. Great for sticking card and paper, quickly and easy to use
Glue dispensers
glue on a roll inside plastic casing with a rolling dispenser at one end. The snail or mouse shaped dispenser is simply glided along paper/card and the glue is laid onto the paper/card. Good alternative to double-sided tape. Available in permanent and repositionable format
Dots of glue
sticky circles, in various sizes on a carrier sheet or roll. Invaluable for sticking embellishments
Dimensional adhesives
Used to provide height and depth to papercraft projects. Perhaps most commonly associated with 3D decoupage but often used to raise just one element off a card for instant dimension.
3D foam pads
small foam pads, in various, depths and sizes, sticky on the top and bottom. Provide an instant bond
Silicone glue
glue in a tube that is squeezed out and applied to the back of work before applying to project. Silicone glue requires drying time but this can be advantages in decoupage as it provides time to move and shape layers.
Wet glue
Most of us will be familiar with PVA and “white glue” as it is often used in schools! This type of glue requires drying time and gives a strong bond.
PVA
available in tubes, often with a fine tip nozzle for precision application. PVA has a multitude of uses including as a varnish when watered down. Water based and dries clear
Glue stick
traditional glue, often used by children. Available in a solid, stick format that you twist up to use. This type of glue is, generally not as strong as liquid glue; suitable for card and paper
Glue pen
wet glue in a pen format, allowing precise application. Generally glue is blue, so that you can see where applying it and dries clear. Stick items when glue is wet and blue for an instant bond or when glue is tacky and clear for repositionable use. Great for sticking small embellishments such as flat backed gems.
Things to consider
Check adhesives used for scrapbooking are acid free. Always read instructions and follow safety Do you want an instant bond or time to reposition work?
Working with children? Make sure the adhesive is suitable – non toxic, washable etc
Take time to consider what you a re doing and which type of adhesive is most suitable
for the project.
Hints & tips
• Always replace lids to stop glue drying out, blocking nozzles and accidental spills
• For precision application of wet glue use a cocktail stick to apply to project
• Use PVA sparingly on paper/card as it will wrinkle paper/card as it dries
• Consider the decorative potential of adhesives – glitter sprinkled over double-sided tape or dots of glue, for example!
• Ask other crafters and demonstrators which adhesive they use if you are still not sure
To cover all your crafting needs, you will need, one adhesive from each of the groups below
Dry adhesives
This group of adhesives are a craft box must have as they are quick and easy to use, nonmessy and in most, cases, give an instant bond like :
Double-sided tape
tape on a roll that is sticky on both sides. Available in different widths. Great for sticking card and paper, quickly and easy to use
Glue dispensers
glue on a roll inside plastic casing with a rolling dispenser at one end. The snail or mouse shaped dispenser is simply glided along paper/card and the glue is laid onto the paper/card. Good alternative to double-sided tape. Available in permanent and repositionable format
Dots of glue
sticky circles, in various sizes on a carrier sheet or roll. Invaluable for sticking embellishments
Dimensional adhesives
Used to provide height and depth to papercraft projects. Perhaps most commonly associated with 3D decoupage but often used to raise just one element off a card for instant dimension.
3D foam pads
small foam pads, in various, depths and sizes, sticky on the top and bottom. Provide an instant bond
Silicone glue
glue in a tube that is squeezed out and applied to the back of work before applying to project. Silicone glue requires drying time but this can be advantages in decoupage as it provides time to move and shape layers.
Wet glue
Most of us will be familiar with PVA and “white glue” as it is often used in schools! This type of glue requires drying time and gives a strong bond.
PVA
available in tubes, often with a fine tip nozzle for precision application. PVA has a multitude of uses including as a varnish when watered down. Water based and dries clear
Glue stick
traditional glue, often used by children. Available in a solid, stick format that you twist up to use. This type of glue is, generally not as strong as liquid glue; suitable for card and paper
Glue pen
wet glue in a pen format, allowing precise application. Generally glue is blue, so that you can see where applying it and dries clear. Stick items when glue is wet and blue for an instant bond or when glue is tacky and clear for repositionable use. Great for sticking small embellishments such as flat backed gems.
Things to consider
Check adhesives used for scrapbooking are acid free. Always read instructions and follow safety Do you want an instant bond or time to reposition work?
Working with children? Make sure the adhesive is suitable – non toxic, washable etc
Take time to consider what you a re doing and which type of adhesive is most suitable
for the project.
Hints & tips
• Always replace lids to stop glue drying out, blocking nozzles and accidental spills
• For precision application of wet glue use a cocktail stick to apply to project
• Use PVA sparingly on paper/card as it will wrinkle paper/card as it dries
• Consider the decorative potential of adhesives – glitter sprinkled over double-sided tape or dots of glue, for example!
• Ask other crafters and demonstrators which adhesive they use if you are still not sure

Craft Glossary
Here is a quick list of explanation of all the crafting terms you hear so often. it is a work in porgress and as I get new one I will expand the list, feel free to email me any you can not find on the list but feel you would like to share.
Craft Glossary
Acid-free
card, paper and other products that do not contain acid (or have a low ph value) This is important in scrapbooking as acid degrades pictures over time see "lingin-free”
Aperture
a window cut into the front of a card blank. Apertures are available in
many different shapes. Cards can be bought with pre-cut apertures or you can cut
your own
Brads
recognised as the humble paper fastener! Brads have a small head and two metal pins that are pushed through paper/card. The pins are opened to hold in place. Brads are available in a huge array of sizes, colours and shapes.
Card blank
Pre-folded card in, generally in standard sizes, ready to decorate and embellish
Cardstock
essential basic card used to make card blanks, matting and layering, die-cutting etc
Crop
group of scrapbookers working on layouts together and sharing ideas
Cropping
trimming a photograph to size or to focus on a particular area
Deckle edge
an irregular, patterned shape. Popular edging for card blanks. Decorative edged scissors – scissors that cut creating a shaped edge, perhaps,most commonly known is deckle edge but many patterns are now available see “deckle edge”
Decoupage (also 3D decoupage)
traditionally the art of layering images and heavily varnishing. Today, better known as 3D decoupage were different aspects of repeat images are cut out and layered on top of each other using dimensional adhesive
De-bossed
the opposite of “embossed”. When an image is indented rather than raised see mbossed”
Die-cuts
pre-cut decorative shapes cut out using a machine. Die-cutting machines and dies are available to buy to die-cut shapes yourself or packs of die-cut shapes can be bought. See “die cutting”
Die-cutting
using a machine to cut shapes. A metal die is run through a machine with the medium to be cut and creates a shape. see “die-cuts”
Dimensional glaze/adhesive
clear varnish which can also be used stick and glaze items. Dries to a high gloss, hard finish
Dry embossing
creating a raised image on paper or card using a stencil and embossing tool. Pressure is applied to the paper or card, through the stencil using an embossing tool creating a raised image on the reverse side of the paper or card see “embossing”
Embellishments
anything that is used to decorate a card! The term covers a wide range of items, usually non-paper, from brads to charms, eyelets to beads. Embellishments can be bought, handmade or found items, never ending really!
Embossing
creating a raised image on paper or card see “dry embossing” and “heat embossing”
Embossing tool
a tool that looks like a pen with metal balls at either end. Used for dry embossing and creasing of paper and card see “embossing” and “dry embossing”.
Heat embossing
creating a raised image on paper or card using a rubber stamp,embossing ink, embossing powder and a heat gun. An image is stamped, sprinkled with powder and heated with a heat gun until the powder melts creating a raised,shiny outline see “embossing”
Heat gun (or heat tool)
a specialist tool that safely delivers very hot air but with very little blow so that embossing powder can be melted and not blown away see “heat embossing”
Lace
from the French word meaning “linked together”. Card is cut using a template and folded to create interlaced design
Layering
sticking one piece of card on to another, leaving a narrow border all around to frame the top layer. More than one layer is often used and called matting and layering see “matting”
Lignin-free
card, paper and related products that do not contain lignin. Lignin is found in trees and therefore only associated with paper products. This is important in scrapbooking as products that contain lignin age over time see “acid free”
Matting
sticking one piece of card on to another, leaving a narrow border all around to frame the top layer. More than one layer is often used and called matting and layering see “layering”
Peel-off
a type of sticker, commonly an outline image that you simply “peel off” a backing paper and stick. Adds instant “embossed” effects to projects see “embossing”
Quilling
the rolling, pinching, gluing and shaping of narrow lengths of paper to create decorative shapes. These shapes are then grouped together to create motifs
Rub-ons – or rub downs!
Quick and easy to use images that come on a carrier sheet. Place transfer motif onto surface and rub over top with the supplied stick to transfer image to chosen surface
Spirelli
the technique of winding thread around a notched shape to create a pattern
Stamps
images formed in rubber or clear polymer that are inked and pressed onto card or paper to create instant images, that can them be coloured
Template
pre-prepared cut out shape that you use to trace or cut identical shapes from. Usually made from heavy duty material so that template can be used over and over again
Vellum
a beautiful, translucent type of paper. Available in many colours, plain or printed
Craft Glossary
Acid-free
card, paper and other products that do not contain acid (or have a low ph value) This is important in scrapbooking as acid degrades pictures over time see "lingin-free”
Aperture
a window cut into the front of a card blank. Apertures are available in
many different shapes. Cards can be bought with pre-cut apertures or you can cut
your own
Brads
recognised as the humble paper fastener! Brads have a small head and two metal pins that are pushed through paper/card. The pins are opened to hold in place. Brads are available in a huge array of sizes, colours and shapes.
Card blank
Pre-folded card in, generally in standard sizes, ready to decorate and embellish
Cardstock
essential basic card used to make card blanks, matting and layering, die-cutting etc
Crop
group of scrapbookers working on layouts together and sharing ideas
Cropping
trimming a photograph to size or to focus on a particular area
Deckle edge
an irregular, patterned shape. Popular edging for card blanks. Decorative edged scissors – scissors that cut creating a shaped edge, perhaps,most commonly known is deckle edge but many patterns are now available see “deckle edge”
Decoupage (also 3D decoupage)
traditionally the art of layering images and heavily varnishing. Today, better known as 3D decoupage were different aspects of repeat images are cut out and layered on top of each other using dimensional adhesive
De-bossed
the opposite of “embossed”. When an image is indented rather than raised see mbossed”
Die-cuts
pre-cut decorative shapes cut out using a machine. Die-cutting machines and dies are available to buy to die-cut shapes yourself or packs of die-cut shapes can be bought. See “die cutting”
Die-cutting
using a machine to cut shapes. A metal die is run through a machine with the medium to be cut and creates a shape. see “die-cuts”
Dimensional glaze/adhesive
clear varnish which can also be used stick and glaze items. Dries to a high gloss, hard finish
Dry embossing
creating a raised image on paper or card using a stencil and embossing tool. Pressure is applied to the paper or card, through the stencil using an embossing tool creating a raised image on the reverse side of the paper or card see “embossing”
Embellishments
anything that is used to decorate a card! The term covers a wide range of items, usually non-paper, from brads to charms, eyelets to beads. Embellishments can be bought, handmade or found items, never ending really!
Embossing
creating a raised image on paper or card see “dry embossing” and “heat embossing”
Embossing tool
a tool that looks like a pen with metal balls at either end. Used for dry embossing and creasing of paper and card see “embossing” and “dry embossing”.
Heat embossing
creating a raised image on paper or card using a rubber stamp,embossing ink, embossing powder and a heat gun. An image is stamped, sprinkled with powder and heated with a heat gun until the powder melts creating a raised,shiny outline see “embossing”
Heat gun (or heat tool)
a specialist tool that safely delivers very hot air but with very little blow so that embossing powder can be melted and not blown away see “heat embossing”
Lace
from the French word meaning “linked together”. Card is cut using a template and folded to create interlaced design
Layering
sticking one piece of card on to another, leaving a narrow border all around to frame the top layer. More than one layer is often used and called matting and layering see “matting”
Lignin-free
card, paper and related products that do not contain lignin. Lignin is found in trees and therefore only associated with paper products. This is important in scrapbooking as products that contain lignin age over time see “acid free”
Matting
sticking one piece of card on to another, leaving a narrow border all around to frame the top layer. More than one layer is often used and called matting and layering see “layering”
Peel-off
a type of sticker, commonly an outline image that you simply “peel off” a backing paper and stick. Adds instant “embossed” effects to projects see “embossing”
Quilling
the rolling, pinching, gluing and shaping of narrow lengths of paper to create decorative shapes. These shapes are then grouped together to create motifs
Rub-ons – or rub downs!
Quick and easy to use images that come on a carrier sheet. Place transfer motif onto surface and rub over top with the supplied stick to transfer image to chosen surface
Spirelli
the technique of winding thread around a notched shape to create a pattern
Stamps
images formed in rubber or clear polymer that are inked and pressed onto card or paper to create instant images, that can them be coloured
Template
pre-prepared cut out shape that you use to trace or cut identical shapes from. Usually made from heavy duty material so that template can be used over and over again
Vellum
a beautiful, translucent type of paper. Available in many colours, plain or printed
Saturday, 19 September 2009
Fiskars Butterfly Template 2
Here is some cards i made quite some time ago using the Fiskars shape cutter and Butterfly 2 template. It was great fun and I think looked pretty nice.


Friday, 18 September 2009
Using Scoring boards
The humble scoring board has come a long way and I feel has become a must have in my craft box but remember there are many different scoring boards available so do a little research before you purchase to make sure the board will meet you crafting requirements.
A Scoring Board is a board made from light weight plastic with a series of numbered and labeled grooves. These grooves are precise measurements that allow you too accurately score and fold card and paper blanks and boxes. These board give you the ability to create different blank folds, such as your basic half fold, concertina fold or gate-fold and boxes Some scoring Boards have the added features such as decorative embossing lines and motifs.
There are scoring boards available to create embossed decorative shapes and motifs only, so no more light box needed and even scoring boards designed to create bespoke envelopes and enveloboxes.
Each board normally come with it's own instructions, but a web search using your favourite search engine will help you find instructions from other crafters using that board. What I have done is taken an A4 sheet of card and ruler on each of mine and drawn the score lines. I plan to adapted a few of the projects I already have to be used on the ScorPal boards as these are simple and easy and you do not even need the board, just a good ruler will do the trick.
I will be posting these tutorials on my blog shortly and will also add links to where you can purchase the most popular scoreboards should you wish to invest in a specific one.
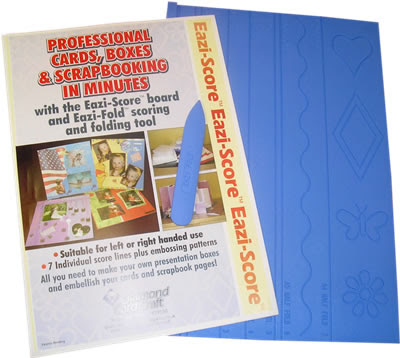
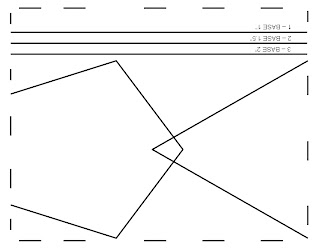
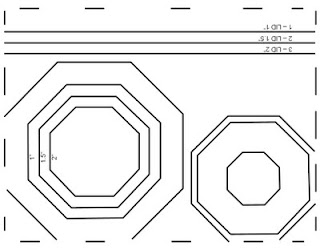
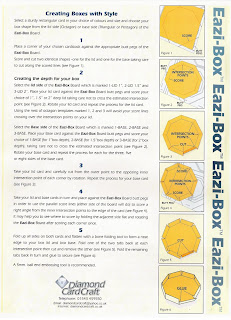
Eazi-Score
Line 1 Box Line 1 in the diagram below
Line 2 Box Line 2 in the diagram below
Line 3 A5 Gate Fold Line 3 in the diagram below
Line 4 A4 Gate Fold Line 4 in the diagram below
Line 5 DL Line 5 in the diagram below
Line 6 A5 Half Fold Line 6 in the diagram below
Line 7 A4 Half Fold Line 8 in the diagram below
M & F Board
Line 1 Box Line 2 in the diagram below
Line 2 A5 Gate Fold Line 3 in the diagram below
Line 3 A4 Gate Fold Line 4 in the diagram below
Line 4 Z-Zag Leaflet A4 Line 5 in the diagram below
Line 5 A5 Half Fold Line 6 in the diagram below
Line 6 A4 Half Fold Line 8 in the diagram below
Hints & tips
A Scoring Board is a board made from light weight plastic with a series of numbered and labeled grooves. These grooves are precise measurements that allow you too accurately score and fold card and paper blanks and boxes. These board give you the ability to create different blank folds, such as your basic half fold, concertina fold or gate-fold and boxes Some scoring Boards have the added features such as decorative embossing lines and motifs.
There are scoring boards available to create embossed decorative shapes and motifs only, so no more light box needed and even scoring boards designed to create bespoke envelopes and enveloboxes.
Each board normally come with it's own instructions, but a web search using your favourite search engine will help you find instructions from other crafters using that board. What I have done is taken an A4 sheet of card and ruler on each of mine and drawn the score lines. I plan to adapted a few of the projects I already have to be used on the ScorPal boards as these are simple and easy and you do not even need the board, just a good ruler will do the trick.
I will be posting these tutorials on my blog shortly and will also add links to where you can purchase the most popular scoreboards should you wish to invest in a specific one.
Eazi-Score
Line 1 Box Line 1 in the diagram below
Line 2 Box Line 2 in the diagram below
Line 3 A5 Gate Fold Line 3 in the diagram below
Line 4 A4 Gate Fold Line 4 in the diagram below
Line 5 DL Line 5 in the diagram below
Line 6 A5 Half Fold Line 6 in the diagram below
Line 7 A4 Half Fold Line 8 in the diagram below


M & F Board
Line 1 Box Line 2 in the diagram below
Line 2 A5 Gate Fold Line 3 in the diagram below
Line 3 A4 Gate Fold Line 4 in the diagram below
Line 4 Z-Zag Leaflet A4 Line 5 in the diagram below
Line 5 A5 Half Fold Line 6 in the diagram below
Line 6 A4 Half Fold Line 8 in the diagram below

Crafters Companion Top Score Multi board and Ultimate Pro
Line 1 Box Line 1 in the diagram below
Line 2 A5 Gate Fold Line 3 in the diagram below
Line 3 A4 Gate Fold Line 4 in the diagram below
Line 4 Tri Fold A4 Line 5 in the diagram below
Line 5 A5 Half Fold Line 6 in the diagram below
Line 6 5” Square Line 7 in the diagram below
Line 7 A4 Half Fold Line 8 in the diagram below


Line 1 Box
Line 2 Box
Line 3 A5 Gate Fold / Concertina A5
Line 4 A4 Gate Fold / Concertina A4
Line 5 DL / Leaflet Zig Zag / Tri-Fold A4
Line 6 A5 Half Fold
Line 7 5” Square
Line 8 A4 Half Fold
Hints & tips
- For best results use an embossing tool for scoring and the edge of a bone folder to flatten folds – this will avoid “crushing” folds.
- Don’t be heavy handed when scoring, particularly on light weight paper, to avoid damaging the surface of the paper.
- For precision scoring make sure the piece of paper you start with is the correct size and always make sure the paper/card is pushed firmly against the butt board.
- When embossing decorative motifs make sure the paper/card is placed face down so that when you turn it over the embossed image is on the front.
- If the embossing tool is difficult to score along the card scribble wax over the paper/card or rub the embossing tool against the side of your nose – this picks up a little oil and helps the too glide more smoothly!
- Buying cardstock and scoring yourself to make card blanks can often be cheaper and gives you the versatility of making card blanks from any card stock you have.
- To achieve edge to edge folds – keep the cardstock pushed against the butt bar, fold the cardstock inwards to meet the butt bar and crease using a bone folder.
Thursday, 10 September 2009
Bianca
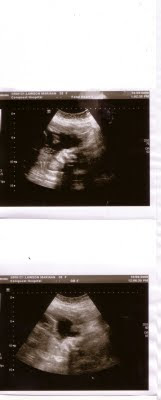
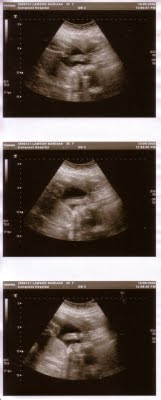
Here is the lastest photo's of Bianca, now all we need is a definate due date, which we will hipefully get today.
At the moment my Maternity leave will start on the 23rd of October 2009 and that will be the time to start watching my blog again as i will be uploading all the cards, albums and projects I have done in the last few months. And even better this time I will actually have instruction and pictures on how I have achieved some of the more difficult ones.
I am really exited and Daddy is so happy that it is going to be a little girl.
At the moment my Maternity leave will start on the 23rd of October 2009 and that will be the time to start watching my blog again as i will be uploading all the cards, albums and projects I have done in the last few months. And even better this time I will actually have instruction and pictures on how I have achieved some of the more difficult ones.
I am really exited and Daddy is so happy that it is going to be a little girl.


Sunday, 30 August 2009
Mother in Laws birthday card
Here is some photo's of a card I made for my mother-in-laws birthday. I am curretnly working on a similar one for my mother and will hopefully be doing a tutorial for you as soon as my maternity leave start at he end of October 2009.


Friday, 31 July 2009
The reason for my Absense

I am 17 weeks Pregnant and have not been crafting as often as we are redecorating and getting things ready for Bianca or Ben. We have also only just recovered from the horrid "swineflu" virus, luckily without any lasting effects. I will start working on my new baby scrapbook soon so be sure to check back for updates on that.
Friday, 8 May 2009
Hot off the Press Instant Card Art and Creative Kits
Instant Card Art and Creative Kits make creating handmade cards quick and easy. I love how everything matches, and that the papers and embellishments work great together or separately. I love that all the Creative Kits and Instant Card Art match the Cardmaker's Creative Packs, so the colors and style of the papers match all the accessories! And each kit has all the embellishments I could want for cards: Silk flowers and both mini and standard brads, plus cool painted brads. In every Creative Kit there’s also something extra, like shaped arrow brads, turn mounts, or mini Brad Buddies™ (depending on the kit), all of which are painted metal.
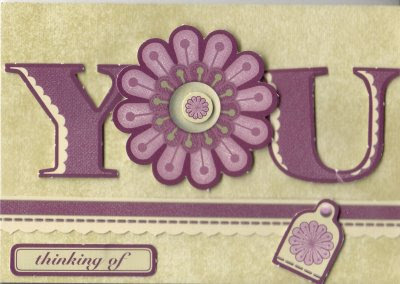
I used the Earth's Palette for these and simply made the cards as suggested in the Instant Card Art as my creativity is at a all time low.
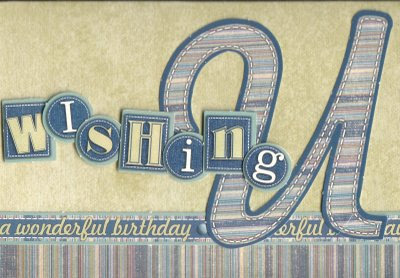
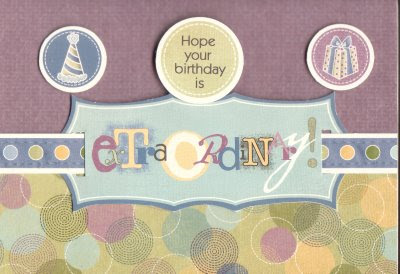
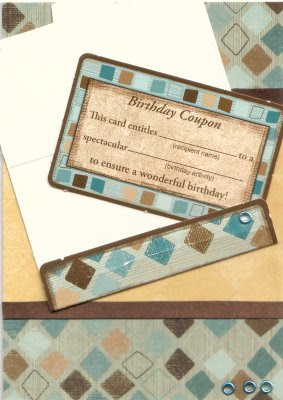
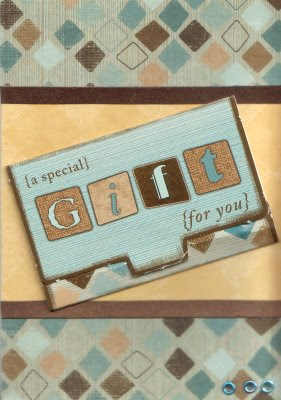
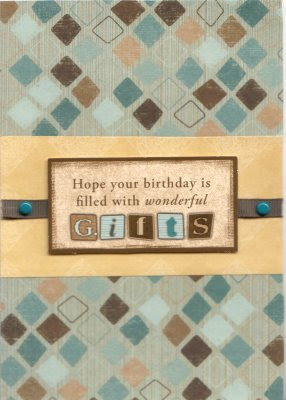
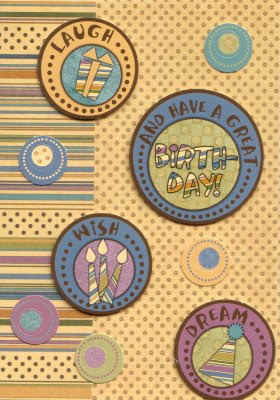
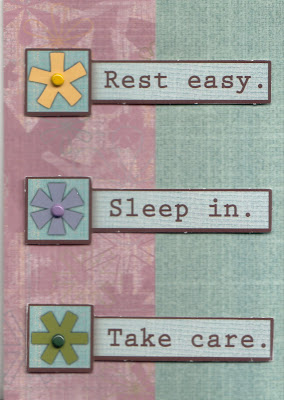
I used the Earth's Palette for these and simply made the cards as suggested in the Instant Card Art as my creativity is at a all time low.


Blog Candy

Donna is nearing 10,000 hits and are celebrating the launch of her two new CD's Designer Extreme Vol. II and Designer Inserts Extreme, on May 4th, so she has a giveaway. This blog candy will run till May 15th and the winner will be picked on May 16th at 7pm (England time) This blog candy is open to everyone worldwide, I'm happy to post anywhere, so please spread the word.
Tuesday, 28 April 2009
Flower Fairies Cards
As there is a lot of little birthday girls in my son's class at the moment that love fairies I bought a special issue of the Let's Make Cards Magazine. Here is just a few of the cards I have made using the Fabulous Flower Fairy-themed kit containing 250+ pieces. While you are at the site also help yourself to some of the free downloads , all you have to do is register.
Also check out the original Flower Fairies site. Again there is a lot of free downloads and games to have a look at.
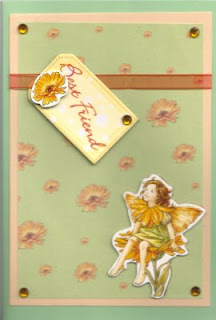
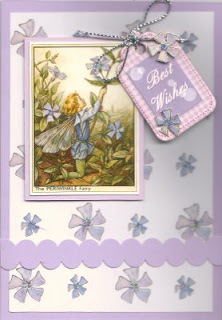
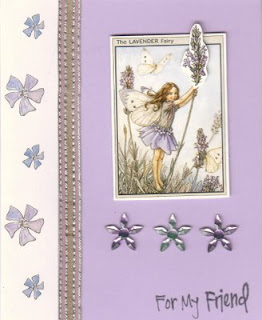
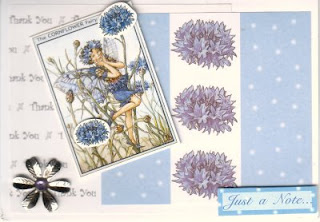
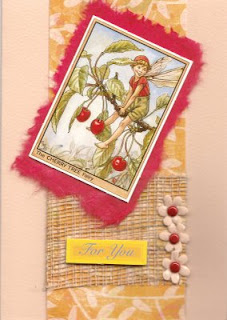
Also check out the original Flower Fairies site. Again there is a lot of free downloads and games to have a look at.


Blogging Absense
I have not been blogging for a while because I am a crafter at heartand have been spending my time making cards for the Create-a-Card for Cancer Care. I set myself a goal of 200 but have achieve 263 and was literally seeing how many I could have ready before the 30th of April 2009 when the campaign close. I think I did quite well considering I had a month of after my carpul tunnel operation,that was a big success by the way.
I have managed to scan most of the cards and will be posting them over the next few days. I am also trying my best to work my way through the massive stash I managed to collect over the last 6 years. A lot of the goodies I have used is no longer available for sale. I will provide you with links to the more recent products should you wish to get your hands on them.
I have managed to scan most of the cards and will be posting them over the next few days. I am also trying my best to work my way through the massive stash I managed to collect over the last 6 years. A lot of the goodies I have used is no longer available for sale. I will provide you with links to the more recent products should you wish to get your hands on them.
Monday, 27 April 2009
Cards made with Little Claire's goodies


Here is 4 cards I made from scraps of background papers I found in my stash and design sheets from Little Claire's Designs.
These Design Sheets are perfect for you if you don't like or want to stamp. They are great value for money (only 90p for a sheet of 6 designs) and you have 6 gorgeous designs all pre-coloured, all you have to do is cut out to make your cards.
Thursday, 23 April 2009
Blog Candy
Come have a look at Bev's lovely blog candy here and while you there also look at this lady's lovely cards. She totally inspires me.
Free online Craft Magazine
You can find a free copy of Craft Focus Magazine here. It is the ideal place to find suppliers of you favourite craft goodies.
Monday, 23 March 2009
Stamper's Ten March Challenge

Here is my card for the Stamper's Ten challenge.
Ingredients:
Card/Paper: Chocolate Chip, Ruby Red, Old Olive card with Holiday Treasures designer paper
Ink: Chocolate chip standard cartridge
Stamps: Baroque Border Standard Wheel
Other: Flowers, leaves and brad from Hot off the Press
Card Size: 15cm x 10.5cm (approx 4" x 6")
Method:
This card was made using the Challenge pack provided by Joanne, our Stampin Up host. Feel free to go look at some of her wonderful samples here or join Stamper's Ten.
I used the SU Standard Wheel to create a border on two of the sides of the card and then created an accent as follow:
Waterfall Pocket Fold:
Fold a 3" square of double sided designer paper on half, side to side.
Fold it again, bottom to top.
Turn the folded square on point so the open edges are on top.
Fold down the first layer so it ends ¼” above the bottom point.
Fold down the second layer ¼” above the first layer.
Fold down the third layer ¼” above the second layer.
Do not fold the last layer.
I attached this to the card and added my leaves and flower to the pocket and did soem matting and layering for more detail.
Hope you like it.
I've been Published
This is a layout I did in 2004 for David, it was published ub Creative Scrapbooking in Issue 6 of June 2005. I know this is a long time ago but I was just going throught some of my stuff and found the magazine and thought why not share it with you all.

Wednesday, 18 March 2009


Stamper's Ten February Challenge

Ingredients:
Card/Paper: Whisper White, Always Artichoke and Tea and Crumpets designer paper
Ink: Regal Rose, Rose Red, Apricot Appeal, Always Artichoke
Stamps: Live Your Dream for the flower image, Thank You Kindly for the words
Other: Hot off the Press Diamond Folds #2 Template, Sakura pen, Hot of the Press Pretty Creative Pack for brads and flowers.
Card Size: 15cm x 10.5cm (approx 4" x 6")
Method:
This card was made using the Challenge pack provided by Joanne, our Stampin Up host. Feel free to go look at some of her wonderful samples here or join Stamper's Ten.
I used my Sakura pen to draw a border around my stamped image and message. I added 3 brads to the main image and layered it on the Always Artichoke card stock. I then traced the daimond lattice from my template using a pencil and cut it with a craft knife, before folding over to show that patterned paper on the back. I highlighted the edges of the lattice cut with my Sakura pen and mounted it on Always Artichole. I went round the edges of the patterned paper with my Sakura pen and mounted it on my white base card.
Special Card for Hannah
David is going to a birthday party on Saturday (21/3/9) and wanted a very special card, so here is what I made. It took me nearly a whole week to complete. You can have a look at the template here. I think it came out great and hope that the little lady likes her card.


Subscribe to:
Posts (Atom)