Monday 29 September 2014

CREAlies Create-A-Card No5 an and Nina Crafts


I wanted to show that once you have a CREAlies create-a-card die you do not need too much else to create a great card, so I made these three cards.  It is amazing how many people think that you need to use a lot of dies to create a card I prefer a clean and simple style and hope you enjoy looking at these as much as I enjoyed making them.
 

For this card, I simply used some Nina Craft stamps, Memento’s black ink, and Alcohol markers. I had a small piece of holographic acetate in my stash and decided to stamp the glass with StazOn and glue this over the top of my glass for a bit of glam. (July 2012 project club stamp set 'Classy Cocktails' and a new and free to class members stamp 'Pineapple Cocktail'.)


For this card I used some free papers and a topper from a magazine with the Robin Wishes Stamp from Nina Crafts.  I stamped the Robin on white Shrink Plastic and coloured it with Distress Markers before shrinking it and attaching it with a Glue dot. I added a green bow just to finish of the card.


A very simple card again using the Crealies Create-a-card No 5 die and some paper and decoupage toppers from the Me To You range by Docrafts


Thursday 4 September 2014

Crealies


A "series " of guest designer posts will be posted on the CREAlies blog every Tuesday but this beautiful creation by Norma Lee was so good it got posted the Friday before so go have a look at the rest of her creations at From My Craft Room.


Anneke kicked of the first official post and you and see her creation here and remember to go look at her blog as well. 


You can also view the design gallery with products used to create each project here or go check out these blogs:
 

Designteam:
Blog Crealies Designteam
Blog Anja
Blog Hennie
Blog Marianne
Blog Miriam
Blog Lean
Blog Shirley
Blog Wilma
Facebook Crealies
Facebook group Crealies
Pinterest 

Webshop: 
www.crealies.nl

Keep checking back for updates on these lovely creations.
Here's my answers to the Crealies-guest designer questions:
  • Name: Mariaan Lawson
  • Blog: http://bonscraft.blogspot.co.uk/
  • What or Who inspires you? I get my inspiration from everything around me and have to admit that I sometime steal ideas from my son (10) and daughters who are only 3 and 4 years old and love to craft with me.  They have not had anything influence their creativity yet so they are tend to be more original and "out of the box" then I am.
  • What do you like best: I love creating nice things, sharing and teaching other to be able to be the best they can be or as creative as they can be.
  • How would you describe your own style?  I love femine styles and was always a very girly girl but do not let this limit my creations
  • Favourite colours: Purple and Apricot but not together
  • Favourite technique: stamping and colouring
  • Favourite way of colouring: I love pencils but do also play with alcohol markers and marker pens.
  • Favourite Crealies Product:  I love the card templates and the clever way these where designed not to be to bulky to store so go watch the Youtube video showing you what they look like and how to use them.  I also love the doily elements and hope to get some CREAlies stamps soon I can  create my own backing papers and add focus to my cards and mini books.

Tuesday 2 September 2014

Creating a Crafters Resume for Design Team applications

A lot of companies are currently advertising for Design Team members and I have applied for a few.  I have not been to successful so I did some home work to see what the people who get to be on design team do differently from me and in this post I would like to share my discoveries with you.  Consider blogging or even getting your work published with letters to magazine editors with a photo of yourself and your work as this can be the start of something bigger. Personalized cards count as well and if you got a note from the person that requested it praizing you, scan it and post a photo of it with the card.  All these things count when you apply to join a design team.

Companies receive hundreds of application from all over the world and it can be a very intense process to select only the best so make sure you stand out.  Most companies want you to send them photo's of two to three of your favourite/best creations with a description of yourself and your work.
  

Important questions to ask yourself first:

Think about what you specialize in and start a list.
How many years have you been a crafter?  
What is your experience?  
What have you created? 
Who or what have you designed for?
  
Here is a basic template of what is required:

Resume

About Me:  
I've been crafting (card making, scrapbooking, etc) for ...... years. I love a wide range of projects such as pages, altered items, articles, sketches, and challenge inspiration pages.I am currently looking for design opportunities.  Please feel free to contact me with any enquiries via e-mail!

Certificates or Qualifications:

Current Design Teams:

Past Design Teams:

Guest Designer:

Pending Publications:

Publications:

Contests or Challenges Won:

Featured Here: 
Forums you belong to and share your photo's and tutorials on.
Additional Information:   
Here I would include a list of link where photo's or samples of your work e.g Photobucket, Flickr, etc can be seen followed by my Social media buttons to Facebook, Pinterest, Instagram, Twitter, Google+, LinkedIn, etc

So now that you know what to put on your resume we can look into each section seperately.  Next week a little more on who post design team call or publication calls and why as well as what they are looking for.

I hope that you found this helpful, if you did please leave a comment and if you feel I left anytjing out please feel free to tell me all about it in the comments section.
 

Wednesday 9 July 2014

Crealies Design Team


As you all know I have been going on about Crealies dies and how much I love them. I was invited to be a Guest designer, they have had many applicants so I am really happy that I am getting this chance.  I will post more info in August and let you know when my post goes live.


I am so excited and looking forward to working with the CREALIES DESIGNTEAM:

Tuesday 1 July 2014

Short Holiday

Instead of crafting last week we had a short break with our girls.  The hubby surprised us with a few days of during the week so we made the best of it.  Unfortunately my son (10) still had to go to school so we just made the best of local attractions.

We spend quite a few days in the Hastings Nature Reserve as it is so close.

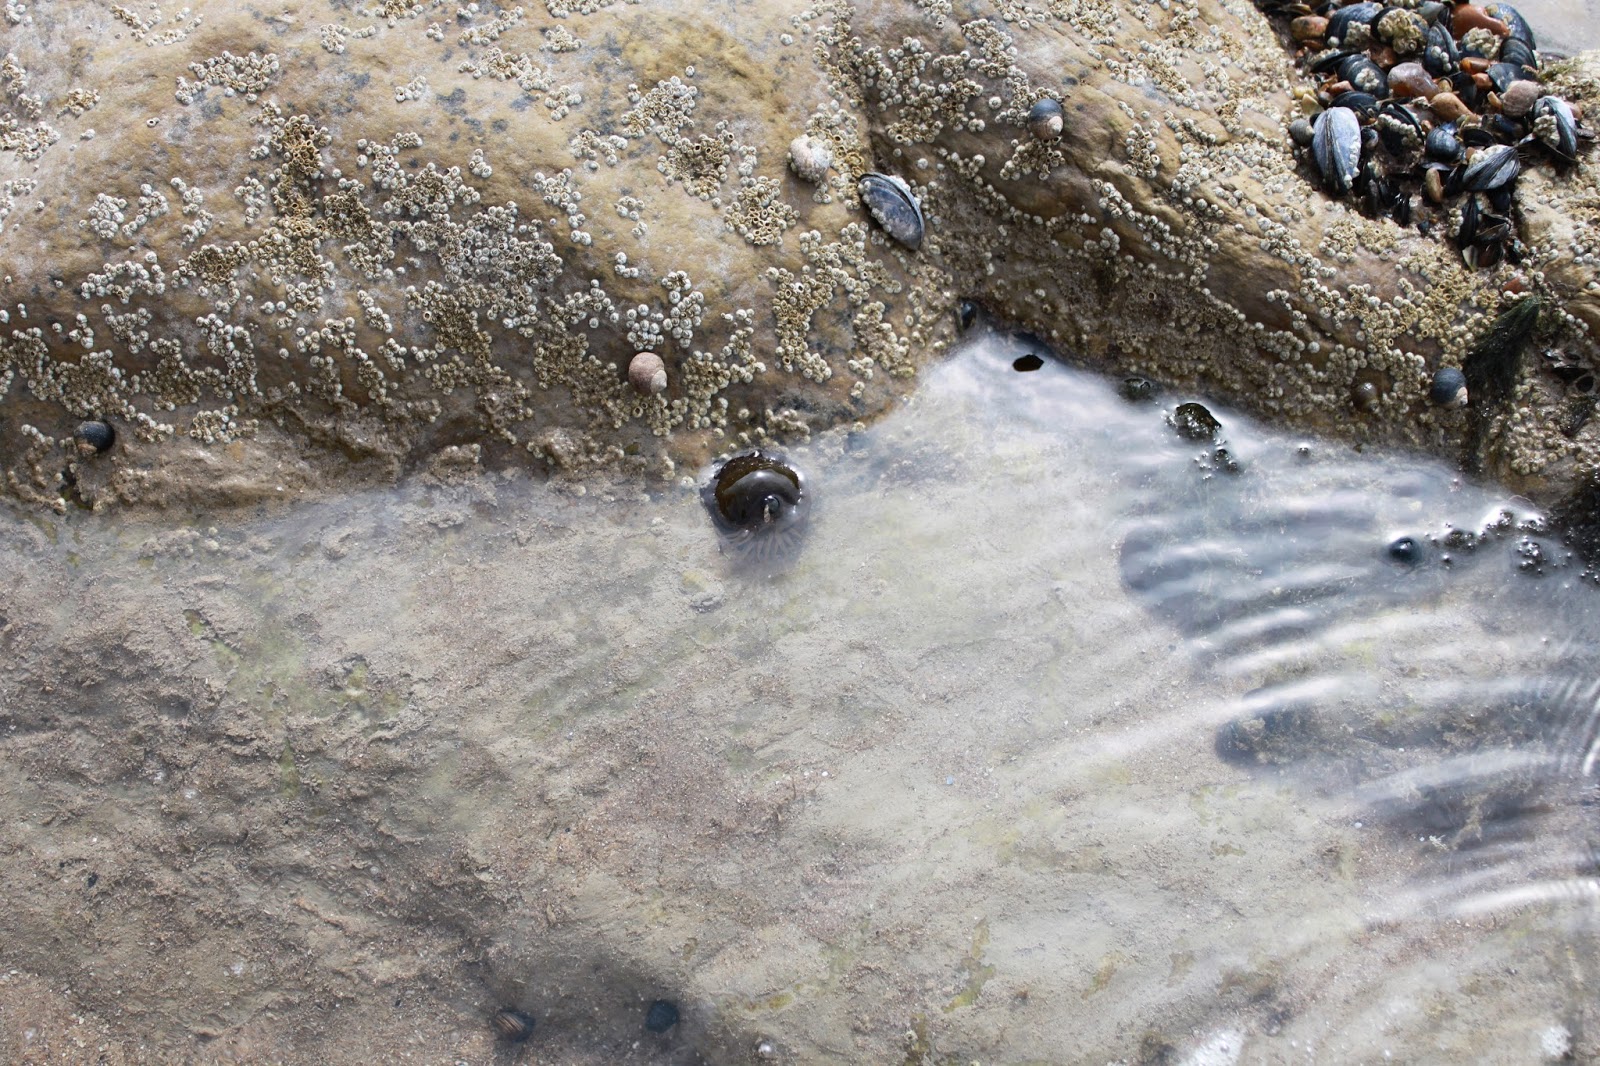
We went to the rock pools where we found all these wonderous things:


Beadlet Anenomes:  The beadlet anemone, Actinia equina, is a common sea anemone found on rocky shores around all coasts of the United Kingdom. 
Underwater, it displays up to 192 tentacles, arranged in six circles. Out of water, the tentacles retract and the anemone resembles a blob of red, brown, green or orange jelly, up to about 5 centimetres (2.0 in) across. It has bright blue spots (known as acrorhagi) located just beneath the tentacles, organised as an external ring containing stinging cells located at the top of the column that it uses to fight over territory. The acrorhagi contains the cnidocysts which themselves contain the nematocysts. There is some evidence that the various colour forms may in fact be different species.  In the second photo you can see the tentacles partly out.


A small to medium-sized blenny, elongate small fish of a large family of fishes that live in rocky areas in shallow water. All true blennies have a continuous dorsal fin with the first dorsal fins are spiny and the remainder are soft. The pectoral finds are relatively large. The pelvic fin is in a jugular position. Distinguished by the absence of tentacles/lappets over the eye. Usually green with black mottling, adults may be grey with black. Males in breeding livery go all black with a white mouth and an attractive pale blue fringe to the long dorsal fin. If the small green blenny has blue spots and a lappet over the eye it is the similiar but rarer Coryphoblennius galerita.


 And then my favourite find was the hermit crabs in the photo's above, they are really secretive little creatures, hding in their shells, but if you put then just on the edge of the water they scurry bak into the water quickly popping out of their shells.

Then we walked down a Glen and took these lovely photo's:


Saturday 21 June 2014

My CREAlies Collection


As promised here is my collection of  CREAlies dies Set of 3 Butterflies no. 3 dies,  Creative Tags die no. 2Doily Elements die no. 2, Doily Elements die no. 5  and the newest ones that I ordered from their webshop two days ago Crealies Create A Card die no. 5  and Crealies Create A Card die no. 4.   The Create A Card dies sells for €12.50 each and  €3.53 P&P is cheap when you consider how quickly they got here, Thank you  Annelies.

I already went to the  Downloads section as  there are links to several PDFs with placement options of the Crealies Create A Card dies on cardstock so now I can go play.  If you do not here from me for a few days you know why, I will be too busy crafting, but by next week I am sure I will have some to share with you. 

Happy crafting to you all and do not forget to go look at their blog for some inspiration:)

Friday 20 June 2014

Crafty Challenges

 Sometimes it's just nice to have to 'think outside the box' for the sake of it and to make something you may not otherwise make so I use challenges for this and sometimes even combining more then one for a specific project.  I do not nessarily enter the challenge as some of the challenges have rules I can not really bother to follow and it feels like the "papercrafting" polivce will come for you if you dare stray from there rules.  It can however be a great way to expand your stash if yous tick to all their stringent rules.

You have to remember a few things if you are going to enter challenges though like:
Linking to your actual creation, by this they mean the actual blog post with it in and not your entire blog. You can understand this rule as you may make a post a day and the challenge blog may not get round to viewing your creation for a week or two and have to scroll through looking for your entry which consumes a lot of time. It is also advisable to link back to them or at the very least a mention to the challenge name and challenge host.


Some challenge blogs will not even consider your entry if the links are not done correctly so have a quick read of all the rules and if you want to be considered for the prizes, do this correctly.  Most of the time there will be a tutorial or explanation on the challenge blog of how exactly they would like it done.

I will be updating the challenge regularly as I find new challenges because I think it is a great way to get you out of a crafting rut and challenge you imagination to make the most of all your craft stash.

DailyDare4U

 The Daily Dare lists team challenges only as there are too many independent demonstrator challenges to include them all.  It is a ver comprehensive list though.  They also have a list of places you can find Card Sketches from.

Card and Craft Challenge list

Another stunning list with tons of challenges.

Monday

The Pink Elephant
Mojo Monday A card sketch challenge created by Julee Tilman in 2007 on Poetic Artistry before moving here in 2009.
Stamp with Fun!


Monthly Challenges:

Kaarten-maken-met-Tiets 

Here you can find a lovey card scketch as well as a Digistamp Challenge

Next time I will be telling you more about Design Teams and the criteria most Organizers would like you to meet, so till the next time practise your craft, enter challenges and send your creations into magazines to get published.

CREAlies

I really love the CREAlies dies and had a hard time finding these dies in the UK.  I already have 2 of their dies:  Set of 3 Butterflies no. 3 dies and  Creative Tags die no. 2 and have rececntly ordered Doily Elements die no. 2 and Doily Elements die no. 5 from Ebay but wanted to expand my collection.  

I gave up on finding in the UK and did a online search to find their webshop but was sceptical to order from the Netherlands due to the high International Shipping costs all other shops charge. Yesterday I however decided that their Crealies Create A Card will be worth what ever shipping I would have to pay so I ordered Crealies Create A Card die no. 5  and Crealies Create A Card die no. 4 and to my surprise  I only paid €3.53 P&P for the two dies.  I am so excited to get these and can not wait for the postman to knock.  One thing I have to say about CREAlies is that I am impressed with the Downloads section as  there are links to several PDFs with placement options of the Crealies Create A Card dies on cardstock so no guessing.  

I loved the Harmonica Template years ago and even have a Craft Special Book called Harmonica Folding by Annelies Karduks from CREAlies and must say I do hope that one day they will turn these into Cutting dies.  Here is just one of the first cards I made. 


Looking back now I can improve this in so many ways and hope that my creations will show you the real potentail of these new dies.  I think it is funny how after all these years of cardmaking it is still the same things that impress me and that I really love doing.


If you are into paperflower making you have to invest in CREAlies flower dies but do not trust me when I say this go look for youself at their Blog, Facebook page and website.  Or search Pinterest to see just a few CREAlies creations.

To be honest with you I think if you are new to cardmaking the CREAlies webshop is the only shop you will need for Dies, Stamps and Masks as you can make your own background papers using the stamps and masks, not to mention the embellishment and toppers you can make using combinations of dies and stamps together.  So whether you are looking for that special Flourish, Alphabet, Leaves, Flower, Tag, Label or Border die and lots more you can find it all at CREAlies.


You can expect a full review with photo's and a video as soon as I receive these as I am sure a lot of you are wondering just like me what the actual Create a Card die looks like.

I will also be making some Card Candy to share with you using these dies, more on this later.

Thursday 19 June 2014

Nina Crafts Project Club stamps set for February 2014

Picture
 This months Project Club set from Nina Crafts is all
about tennis and was so much fun to work with!  I thought this month I would take a picture of the stamp set as it comes, so you can see what to expect in you envelope each month.  The sets are all A5 in size and very versatile.  If you subscribe to the club you  would not only get  these stamps,  but for £10 the every month would receive;  Card stock,  embellishments,  instructions sheet, and newsletter and not forgetting  the 25% discount online!!  And the best of all Project Club members get 1 month exclusivity of these sets!! So go get them here before anyone else!!


Picture


I decided to make a Stepper Card this month with a tennis net and ball like in a real game.

Yet another very simple card using this set.  You can see some more samples on the Nina Crafts Blog.


Tuesday 10 June 2014

Thank you Dragonflies

 Wow at last I have three afternoons a week free to craft and blog again.  I do not mean to sound like a bad mum but did miss some me time and now that the girls are at nursery in the afternoon I get to do a few things that has been neglected.

I was clearing out my craft shed the other day and realised how many clear stampsets I have that I have not used in some time and found this lovely set by Woodware that I absolutely loved  and as I had to make a thank you card thought I would have a play.

 
I created a panel by stamping three dragonflies and then added some details inbetween.  I stamped the flowers and cut them out by hand, shaped them slightly and then mounted then with 3d foam pads.  I used another stampset that I can not remember the manufaturer of for the insert.  It was received very well.
 
 
While I was having so much fun with the stamp set I decided to try my had at making my own gift wrap and stamp all over a sheet of plain brown paper and colouring it with gel pens and Spectrum Noir makers.  Yet again the person receiving the gift loved this personal touch.

I have also taken on some other projects in my local community like doing a volunteers course at my local Children's Center and do a few hours per week there from time and have become a voting partner on a community development programme funded by the Big Local and are hoping to improve things for everyone in particular my kids. Might sound selfish but in improving things for them I am indirectly improving things for others in the community.  So I am keeping busy and loving being more then "just Mum" for a change.


Here is an insert I made for another card using the same stamp set and paneling like the first card.  I really loved how it came out.

Monday 9 June 2014

PROJECT CLUB STAMP SET for June 2014 by Nina Crafts

Wow I can not believe how quick the months are going now, June already and there is flowers everywhere you look even on this months stamp set, which I really loved playing with.  Here is a few of the card samples I have made and taken photo's of before my camera got dropped by one of my little monkeys.  There is a few more including a lovely butterfly I created using the corner stamp that I will post photo's of as soon as the camera is repaired.


This first card has a Christmas feel to it.  I repeat stamped a single flower image onto a piece of white card and then coloured the flower with Spectrum Noir Pens in shades 3, DR4 and 12 with GB6 in the center  I then coloured around the flowers with JG4, added some golden ribbon and matted it onto black card before mounting it onto the the font of a cream hammered card base.  The front was trimmed in half to show part of the inside and are closed with tags and ribbon.  The insert was created by stamping the single flower in the corner of a white card stock piece before using DR4, JG4 and a Black Spectrum Noir to create faux layering.  There is lots of open space to write a personal message in this simple card.


Card number two is a simple A6 dark blue card base stamped with the single flower image again using a Brilliance Dew Drop ink pad in Moonlight white.  On top of this I mounted a piece of white card that was stamped with the trellis flower stamp cut into a banner shape.  To colour these flowers I used HB3,146,IN2, IB1 and LG3 for the trellis.  I tied a big bow around the points of the banner and did not add a sentiment yet as I will had this when I am ready to use the card.  It is fit for so many occasions.

 
Card number three again feature the trellis stamp this time coloured with Spectrum Noir pens in 183, 185 , CR3 and Cr1.  I created a screen card as I just could not get enough of this lovely stamp.  To create the feet of the card I used a Stampin up! decorative label punch.


This card  took a while as I stamped and coloured the flowers I using Spectrum Noir pens in  HB3,146,IN2, IB1.  Then carefully cut it all out using a craft knife.  I stamped the Flower box and coloured in in shade TN6, TN3 and TN1..I then mounted the flower box with dimensional foam onto some green backing paper before carefully positioning the main image and attaching this with a quicky glue pen.  I used glitter glue for the flower centers but the camera did not quite pick up all the colours.
 
Also pop over to Jackie's blog to see the lovely video's she does for the project club: http://jackierush.blogspot.co.uk/
 
So if you do not have you set yet go to http://dimensionstamps.com  and here you will find all the stamps sets send out with their ever popular Project Club. If you subscribe to the club you would not only get these stamps, but for £10 the every month would receive; Card stock, embellishments, instructions sheet, and newsletter and not forgetting the 25% discount online!! And the best of all Project Club members get 1 month exclusivity of these sets!! So go get them before anyone else!!

Tuesday 13 May 2014

PROJECT CLUB STAMP SET for May 2014 by Nina Crafts

I had great fun with the May 2014 Club Stamp Set and a few other background stamps from Nina Crafts and thought that I will share with you how I created each of them.


Here is a selection of the papers I created as well as some shrink plastic cupcakes as embelishments for a future card.
 
 
I used VersaMark and Distress Inks to create these.

 
This two background was created by pressing my distress ink pad on to my blending mat and working it from off the card in circular motion to centre of the card to create a fairly smooth colouration on the card.  I then inked up the pattern stamp using the same ink pad and stamped it in a diagonal pattern over the card, making sure to re-ink the stamp everytime and then removing any excess ink before it was completely dry by buffing it with my blending sponge.  On the second I experimented with a different pattern and White pigment ink for some more contrast.


I inked up my text stamp with Versamark in and and stamped it repeatedly over the card, then I sprinkled detailed white embossing powder over this and heat embossed it.  After this I pressed my distress ink pad on to my blending mat and working it from off the card in circular motion to centre of the card to create a fairly smooth colouration on the card as before, left it for a whilw and theb removed excess colour from the embossed areas with kitchen towel. 

This Background was created by pressing my distress ink pad on to my blending mat and working it from off the card in circular motion to centre of the card to create a fairly smooth colouration on the card. I then inked up the polka dot stamp using the a darker ink pad and stamped it all over the card, making sure to re-ink the stamp everytime.


This background was created by pressing my distress ink pad on to my blending mat and working it from off the card in circular motion to centre of the card to create a fairly smooth colouration on the card. I then inked up the pattern stamp using the same ink pad and stamped it in a diagonal pattern over the card, making sure to re-ink the stamp everytime, this time I left the distress ink to dry completely leaving a more vibrant pattern.  before stamping some White pigment ink for some more contrast and interest.


I think this is one of my favourites as well as my favourite technique, you simply stamp your image randomly over the page in versamark and set it aside to dry, whilest making some other papers.  After about 15 minutes I went back to the image and blended Distress Ink over it as before and then dabbed extra colour inside the party hats.


This paper did not work quite as well as I hoped but I thought I would share it anyway incase it is something you would like to try. I took my squar acrylic block and inked it up with one colour then stamped it all over the card, left it for a few seconds whilest cleaning my block and applied another colour and then a yet again another colour. I started with the lightest and then used a blending sponge to yet blend the colours to create a softer look, thinking back I shouls have used less yellow and waited for the colours to dryu a bit more before blending and it might not have been so muted.

Hope you enjoyed this post, I will be posting some cards I made using these shortly but in the mean time here is some other cards I made using the May Project Club Stamp Set.