
Showing posts with label Mini Albums. Show all posts
Showing posts with label Mini Albums. Show all posts
Wednesday, 22 June 2011
Update on my little mini album
The little girl in question absolutely loved it and her mother was just as impressed. David was in seventh heaven with his "commission". He love setting mum little challenges to create custom presents for his friends. ~He even had me make a little toilet roll mini that he then decorated to give to an occupational therapist that has been working with him at school. He should be seeing her on Friday and will give it to her then. Unfortunately he would not let me take photo's of it but promised that I will be allowed to showcase the next one we make together.

Wednesday, 15 June 2011
My newest Project

I simply sprayed the outside of the album with Stick and Spray and then covered in the paper of my choice and cut the title with my CraftRobo. As it is for a little girl (7 year old) I also covered it with a protective self adhesive plastic. I used the recipe cards as a base to create very sturdy pages. Then I pasted coloured card on one side and turned it over to punch the holes in the right place, turned it over and repeated the process before decorating. Hope she likes it. We are giving it to her this afternoon.
Here is the rest of the pages, hope you love it:


Paper Used: Petal Party Scrappin Kit by Stampin Up
Wednesday, 5 May 2010
Folded Mini Album
Front Cover


Back Cover

What You Would Need:
12"x12" Patterned Paper
Double sided Tape
Glue Stick
TOOLS
Piercing Tool or Crop-a-dile
Cutting Mat
Bone Folder
Fold each of the 12x12 papers into 16 equal sections. With the pattern side down, fold the paper in half. Unfold. Fold both sides in to the centre crease; this is commonly called a cupboard fold. Open the paper up and repeat these same folds, but folding in the opposite direction. The paper now has 16 equal sections.

With the pattern side up, fold all four corners to the centre. Unfold. With the pattern side down, fold all outside corners in to the first intersection, or mountain fold. Glue these folded corners down with a glue stick.

The folds in the paper form a 4-section square in the middle. Reinforce these folds by folding the paper in along these existing creases, folding one at a time. Bring the centre of each raw edge inward and down to the centre of the square along the reinforced fold lines, collapsing the corners along the existing creases.

When flattened, the corners of the paper now form a frame. Cut eight 6" squares from a sheet card stock. Insert a square into the four corners the folded page. Make as many pages as you require.

Join the pages together with card stock hinges. Cut five 4" squares from a sheet of card stock. Fold each of theses squares in half diagonally. Open the square and fold on the same crease, but in the reverse direction. Apply double sided tape along each side of the crease. Or Punch holes and use
Remove the backing from the tape. Carefully slide the “hinge” between the layers of one of the pages made in Step 4, lining up the edge of the page with the crease. Press down to adhere. Slide the other half of the hinge between the layers of the next page and press down to adhere. Repeat until all pages are connected.
To secure book closed, apply adhesive to one end of a 18" piece of ribbon. Adhere the ribbon to one side of the back cover, sliding the end between the layers of the cover. Repeat with another piece of ribbon for the opposite side of the back cover.
Decorate the inside pages with mini envelopes, stamped images or photos. Slide each photo into a small vellum envelope stamped with simple words and phrases.
Friday, 30 April 2010
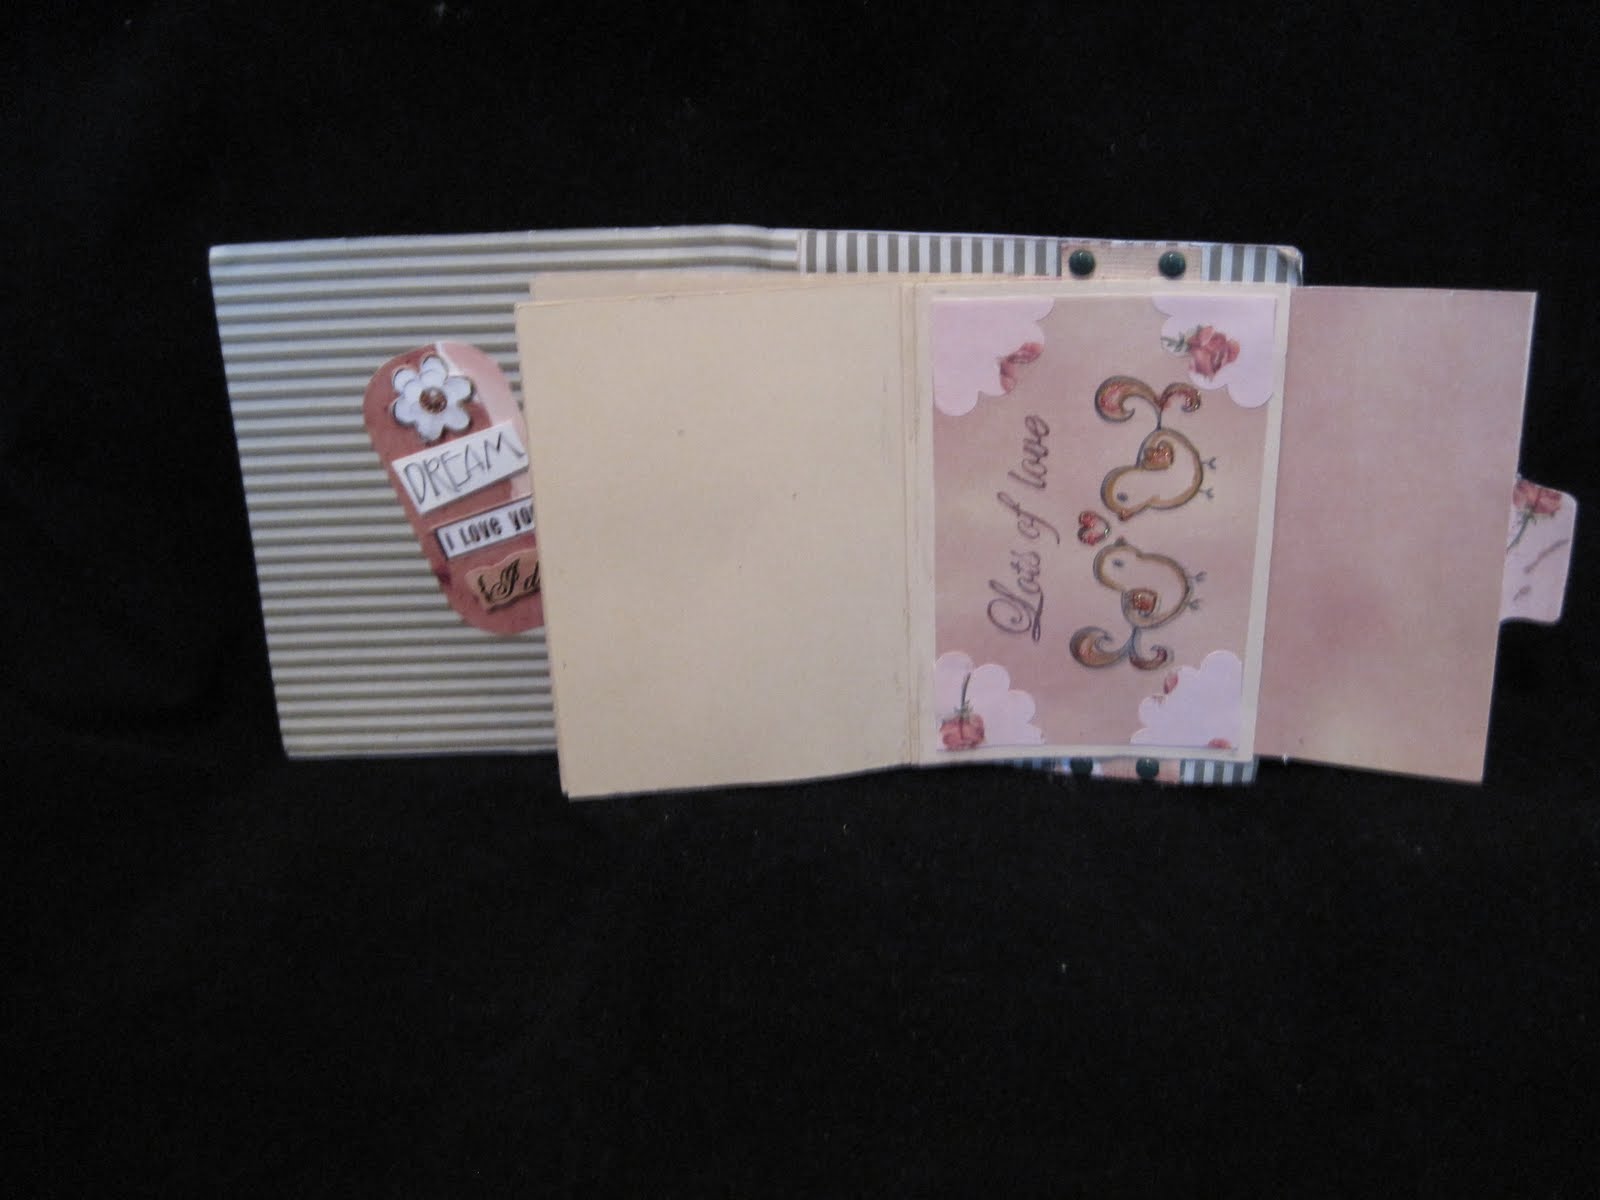
Mini Waterfall Anniversary Album
Here is a Little Anniversary Album I made for my Husband.

Page one is a photo of me on our Weddingday on the beach

Page two is "The Kiss"

Page three is a family photo taken during our holiday on South Africa when my son, David, was 9 months old.

Page four and five does not yet have photo's as Bianca was not yet born when I made it.

 I am in the Process of making another and will take photo's as I go for the Tutorial I will add later.
Materials:
1 piece of 12" x 6" firm cardstock - for the cover (Purple)
1 piece of 12 x 12" firm cardstock - for the 5 pages
cut 5 pages from this sheet with the following dimensions. (Red)
5½" x 5¼
5" x 5¼
4½" x 5¼
4" x 5¼
3½" x 5¼
1 Strip of 11" x 5¼ firm thick cardstock - for the waterfall slider
1 Strip of 1½" x 6" firm cardstock
1 pull tab: 2"x2" piece of cardstock folded in half
Adhesives - wet glue and double sided tape
Paper trimmer
Paper scoring tool
Pencil
Step 1 - The cover
Take piece of 12"x6" and fold it at 5 7/8" and 6 1/8".
Take the 1½" x 6" strip, apply tape to the ends and stick it to the right inner cover 1" in from the rhs. Set the cover aside for now.
Step 2 - Pages
Cut the pages and set these pages aside.
5½" x 5¼
5" x 5¼
4½" x 5¼
4" x 5¼
3½" x 5¼
Step 3.
Take the 11" x 5¼ Strip and score a fold at 3", 3½", 4", 4½", 5, 5½".
Step 4
Stick the tab onto the right hand side
Step 5.
Fold at the first score line, use a bone knife or your thumbnail to create a nice crisp fold. Open the sheet and fold at the 2nd score line, create a crisp fold and apply glue to this section. Take the shortest of our 5 pages (the 3½" x 5¼) and stick it to the fold.
Step 6.
Open the sheet again and fold at the 3rd score line, create a crisp fold and apply glue to this section. Take the 4" x 5¼ page and stick it to the fold.
Repeat Step 6. for the remaining 3 pages.
Step 7
Open up the page slider (the pages should be underneath) Slip the slider under the strip and center the page lot onto the back cover. Take some double sided tape and stick it on to the strip.
Step 8
When the slider and pages are centered then close the album sticking the slider to the top of the strip and stick it down good.
Test your album opens ok by pulling on the pull out tab and decorate.


Page one is a photo of me on our Weddingday on the beach

Page two is "The Kiss"

Page three is a family photo taken during our holiday on South Africa when my son, David, was 9 months old.

Page four and five does not yet have photo's as Bianca was not yet born when I made it.

Materials:
1 piece of 12" x 6" firm cardstock - for the cover (Purple)
1 piece of 12 x 12" firm cardstock - for the 5 pages
cut 5 pages from this sheet with the following dimensions. (Red)
5½" x 5¼
5" x 5¼
4½" x 5¼
4" x 5¼
3½" x 5¼
1 Strip of 11" x 5¼ firm thick cardstock - for the waterfall slider
1 Strip of 1½" x 6" firm cardstock
1 pull tab: 2"x2" piece of cardstock folded in half
Adhesives - wet glue and double sided tape
Paper trimmer
Paper scoring tool
Pencil
Step 1 - The cover
Take piece of 12"x6" and fold it at 5 7/8" and 6 1/8".
Take the 1½" x 6" strip, apply tape to the ends and stick it to the right inner cover 1" in from the rhs. Set the cover aside for now.
Step 2 - Pages
Cut the pages and set these pages aside.
5½" x 5¼
5" x 5¼
4½" x 5¼
4" x 5¼
3½" x 5¼
Step 3.
Take the 11" x 5¼ Strip and score a fold at 3", 3½", 4", 4½", 5, 5½".
Step 4
Stick the tab onto the right hand side
Step 5.
Fold at the first score line, use a bone knife or your thumbnail to create a nice crisp fold. Open the sheet and fold at the 2nd score line, create a crisp fold and apply glue to this section. Take the shortest of our 5 pages (the 3½" x 5¼) and stick it to the fold.
Step 6.
Open the sheet again and fold at the 3rd score line, create a crisp fold and apply glue to this section. Take the 4" x 5¼ page and stick it to the fold.
Repeat Step 6. for the remaining 3 pages.
Step 7
Open up the page slider (the pages should be underneath) Slip the slider under the strip and center the page lot onto the back cover. Take some double sided tape and stick it on to the strip.
Step 8
When the slider and pages are centered then close the album sticking the slider to the top of the strip and stick it down good.
Test your album opens ok by pulling on the pull out tab and decorate.

Subscribe to:
Posts (Atom)