

Monday, 24 January 2011
Reason for my long absense
Sorry to all of you who used to follow my blog for my long absense, the reason for this can be seen in the photo below:
 Her name is Juliet and she was born on 11-01-2011. yes I do now have three children: David who turnrd 7 in December 2010, Bianca who turned 1 in December and our precious little Juliet. I am sure having two littlw ones will take a lot of my time and limit Crafting time but even busy mums need to relax sometimes, so I will have to make time for crafting. Maybe when everyone is asleep at night I will get a chance, providing I do not fall asleep myself.

Tuesday, 18 May 2010
Envelope made with the Hougie Board
I got this Idea after looking at the Martha Stewart Scoreboard. Everybody have a 90 degree triangle and if you do not they are very cheap from any stationer or even a Pound shop.

Making Envelopes with you Hougie board is very easy. Simply follow the steps below and soon you will be making envelopes in minutes. Using the metric side you can also make envelope boxes for your 3d products.
Before starting line up your trinagle as shown in the photo above, the size of the traingle does not matter as long as it is has a 90 degree corner to fit nicely on your board. I use a smaller if I make smaller envelopes.
Decide what size envelope you want to make, check the table below to find out what size paper you need to start with and cut your paper accordingly.
More to sizes to follow.
Now for the steps:

Making Envelopes with you Hougie board is very easy. Simply follow the steps below and soon you will be making envelopes in minutes. Using the metric side you can also make envelope boxes for your 3d products.
Before starting line up your trinagle as shown in the photo above, the size of the traingle does not matter as long as it is has a 90 degree corner to fit nicely on your board. I use a smaller if I make smaller envelopes.
Decide what size envelope you want to make, check the table below to find out what size paper you need to start with and cut your paper accordingly.
| Envelope Size | Start With in cm | First Score | Second Score |
|---|---|---|---|
| C6 | 21x21cm | 6.5cm | 9cm |
| DL | 24.5x24.5cm | 6.5cm | 12cm |
| C5 | 28x28cm | 9cm | 12cm |
| 5"Square | 21x21 cm | 8.5cm | 8.5cm |
| 4"Square | 17x17cm | 6.5cm | 6.5cm |
More to sizes to follow.
Now for the steps:
- Place your paper on the board against with the edge of the paper firmly against the traingle and score down the indicated line.
- Rotate the paper 180 degrees and score along the same line again. Then score the remaining two sides on the second indicated line. I use a corner rounder to soften the corners and make the envelope look more profesional.
- Fold the two outside corners toward the centre.
- Apply your choice of adhesive along the bottom edges of the flap.
- Fold the bottom flap of your envelope and press down to secure.
- To add the finishing touch tuck the top part into the envelope or use a decorative corner punch for a nice effect.
Easel Card and Envelope made with the Hougie Board

For the Easel Card:
- Cut you cardstock 12" by 4".
- Score at 6" and then again at 9". Fold at 6" to create your standard 6"x4" card base. The 9" fold will be on the front of your card and will be the part that help the card stand up.
- Cut a second piece of cardstock to measure 6" by 4", this is the piece that you decorate.
- Adhere you decorated Card stock to the bottom 3" of you card front.
- Open the card and decorate inside. Remember to use a bit of foam tape or double sided foam pads to raise a part of the inside decoration as this is where the top flap will rest when the card is standing up.
A full tutorial in the next post.
Monday, 17 May 2010
Hougie Board
As I told you before I have just about every scoreboard available in the UK, but I just had to buy this one as well as it is a great double sided board. Centimetres and 1/2 cm on one side and inches and 1/2 inches on the other so there's no need to try and convert cm in to inches.
It makes Measuring super easy and accurate first time. With this knowledge comes confidence to try any project and with confidence comes speed. So you can now make more projects in the time you have.
I already have a tutorial ready for the magix box, an A6 Easel card and envelope and also how to make any size envelope with you Hougie Board.
You can order yours here.
You can order yours here.
New Goodies for May 2010

This is the first time that I actually show you my newest acquisitions, the only reason for this is that I am so impressed by them.
I think the Wobblers CD by Kanban is the absolute best CD I have bought in a long time, already made a Magix Box with it. I just had to get the matching stamps as well. I am also bidding on the other Kanban CD Seasons Collection on Ebay and the Two stampsets to go with that I will same for my June Projects.
I will be doing quite a few Tutorials witht he Hougie Board and have started a Hougie yahougroup, contact me if you would like an invitation. The Slice cutting tools I got because they match so perfectly with my Hougie Board and I can also use them to cut on my Hougie board in the grooves with a Ruler. The ceramic blade is just the right lenght so I do not damage my Board.
The 20cm Ruler from Marianne Design is ideal to create perfect matting and Layering bits. I have also invested in quite a few Marianne Design Creatable dies but will show you these as I use them in my projects.
Wednesday, 12 May 2010
Creativity! Cancer Research Campaign Update >> View
|


Wednesday, 5 May 2010
Folded Mini Album
Front Cover


Back Cover

What You Would Need:
12"x12" Patterned Paper
Double sided Tape
Glue Stick
TOOLS
Piercing Tool or Crop-a-dile
Cutting Mat
Bone Folder
Fold each of the 12x12 papers into 16 equal sections. With the pattern side down, fold the paper in half. Unfold. Fold both sides in to the centre crease; this is commonly called a cupboard fold. Open the paper up and repeat these same folds, but folding in the opposite direction. The paper now has 16 equal sections.

With the pattern side up, fold all four corners to the centre. Unfold. With the pattern side down, fold all outside corners in to the first intersection, or mountain fold. Glue these folded corners down with a glue stick.

The folds in the paper form a 4-section square in the middle. Reinforce these folds by folding the paper in along these existing creases, folding one at a time. Bring the centre of each raw edge inward and down to the centre of the square along the reinforced fold lines, collapsing the corners along the existing creases.

When flattened, the corners of the paper now form a frame. Cut eight 6" squares from a sheet card stock. Insert a square into the four corners the folded page. Make as many pages as you require.

Join the pages together with card stock hinges. Cut five 4" squares from a sheet of card stock. Fold each of theses squares in half diagonally. Open the square and fold on the same crease, but in the reverse direction. Apply double sided tape along each side of the crease. Or Punch holes and use
Remove the backing from the tape. Carefully slide the “hinge” between the layers of one of the pages made in Step 4, lining up the edge of the page with the crease. Press down to adhere. Slide the other half of the hinge between the layers of the next page and press down to adhere. Repeat until all pages are connected.
To secure book closed, apply adhesive to one end of a 18" piece of ribbon. Adhere the ribbon to one side of the back cover, sliding the end between the layers of the cover. Repeat with another piece of ribbon for the opposite side of the back cover.
Decorate the inside pages with mini envelopes, stamped images or photos. Slide each photo into a small vellum envelope stamped with simple words and phrases.
Friday, 30 April 2010
Happy Halloween
I made this card as a Thank You card for a mother that invited David to her Daugther's Halloween Party. She loved it, it was also a great way of giving her my Contact number in case sonething went wrong at the party and she needed me to come pick him up.


Mini Waterfall Anniversary Album
Here is a Little Anniversary Album I made for my Husband.

Page one is a photo of me on our Weddingday on the beach

Page two is "The Kiss"

Page three is a family photo taken during our holiday on South Africa when my son, David, was 9 months old.

Page four and five does not yet have photo's as Bianca was not yet born when I made it.

 I am in the Process of making another and will take photo's as I go for the Tutorial I will add later.
Materials:
1 piece of 12" x 6" firm cardstock - for the cover (Purple)
1 piece of 12 x 12" firm cardstock - for the 5 pages
cut 5 pages from this sheet with the following dimensions. (Red)
5½" x 5¼
5" x 5¼
4½" x 5¼
4" x 5¼
3½" x 5¼
1 Strip of 11" x 5¼ firm thick cardstock - for the waterfall slider
1 Strip of 1½" x 6" firm cardstock
1 pull tab: 2"x2" piece of cardstock folded in half
Adhesives - wet glue and double sided tape
Paper trimmer
Paper scoring tool
Pencil
Step 1 - The cover
Take piece of 12"x6" and fold it at 5 7/8" and 6 1/8".
Take the 1½" x 6" strip, apply tape to the ends and stick it to the right inner cover 1" in from the rhs. Set the cover aside for now.
Step 2 - Pages
Cut the pages and set these pages aside.
5½" x 5¼
5" x 5¼
4½" x 5¼
4" x 5¼
3½" x 5¼
Step 3.
Take the 11" x 5¼ Strip and score a fold at 3", 3½", 4", 4½", 5, 5½".
Step 4
Stick the tab onto the right hand side
Step 5.
Fold at the first score line, use a bone knife or your thumbnail to create a nice crisp fold. Open the sheet and fold at the 2nd score line, create a crisp fold and apply glue to this section. Take the shortest of our 5 pages (the 3½" x 5¼) and stick it to the fold.
Step 6.
Open the sheet again and fold at the 3rd score line, create a crisp fold and apply glue to this section. Take the 4" x 5¼ page and stick it to the fold.
Repeat Step 6. for the remaining 3 pages.
Step 7
Open up the page slider (the pages should be underneath) Slip the slider under the strip and center the page lot onto the back cover. Take some double sided tape and stick it on to the strip.
Step 8
When the slider and pages are centered then close the album sticking the slider to the top of the strip and stick it down good.
Test your album opens ok by pulling on the pull out tab and decorate.

Page one is a photo of me on our Weddingday on the beach

Page two is "The Kiss"

Page three is a family photo taken during our holiday on South Africa when my son, David, was 9 months old.

Page four and five does not yet have photo's as Bianca was not yet born when I made it.

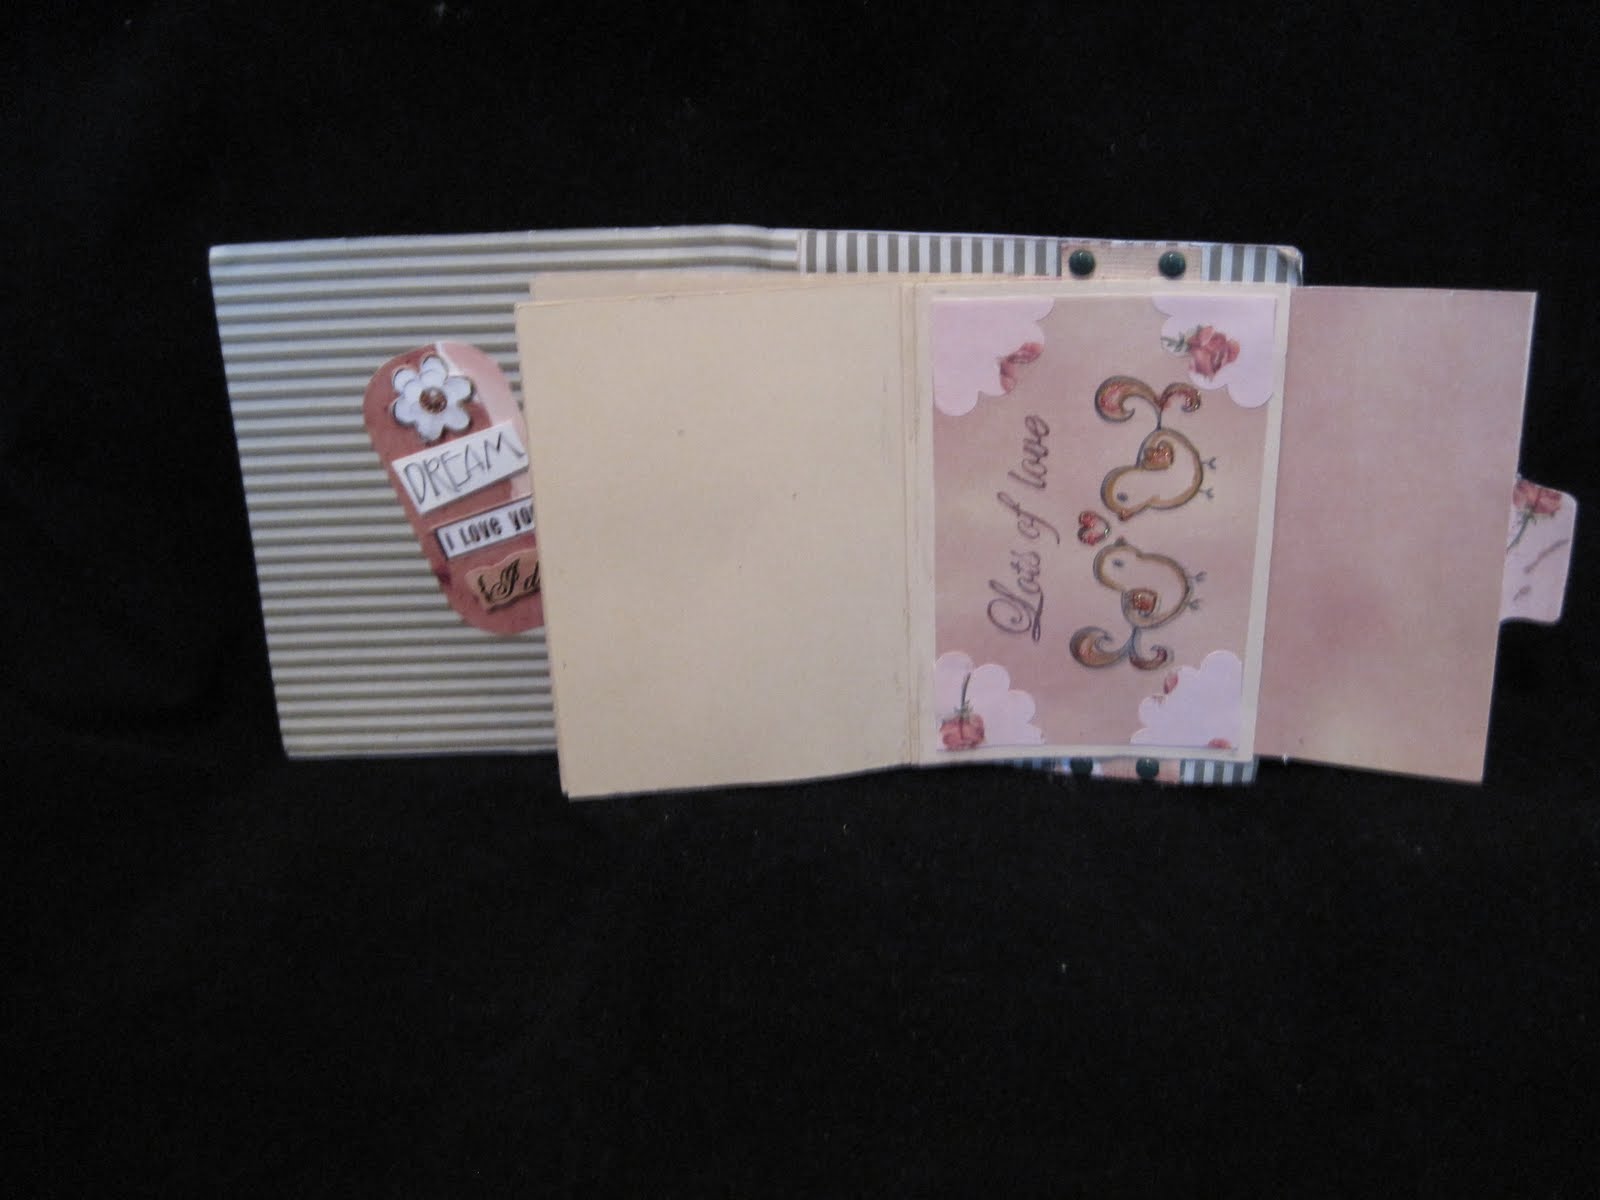
Materials:
1 piece of 12" x 6" firm cardstock - for the cover (Purple)
1 piece of 12 x 12" firm cardstock - for the 5 pages
cut 5 pages from this sheet with the following dimensions. (Red)
5½" x 5¼
5" x 5¼
4½" x 5¼
4" x 5¼
3½" x 5¼
1 Strip of 11" x 5¼ firm thick cardstock - for the waterfall slider
1 Strip of 1½" x 6" firm cardstock
1 pull tab: 2"x2" piece of cardstock folded in half
Adhesives - wet glue and double sided tape
Paper trimmer
Paper scoring tool
Pencil
Step 1 - The cover
Take piece of 12"x6" and fold it at 5 7/8" and 6 1/8".
Take the 1½" x 6" strip, apply tape to the ends and stick it to the right inner cover 1" in from the rhs. Set the cover aside for now.
Step 2 - Pages
Cut the pages and set these pages aside.
5½" x 5¼
5" x 5¼
4½" x 5¼
4" x 5¼
3½" x 5¼
Step 3.
Take the 11" x 5¼ Strip and score a fold at 3", 3½", 4", 4½", 5, 5½".
Step 4
Stick the tab onto the right hand side
Step 5.
Fold at the first score line, use a bone knife or your thumbnail to create a nice crisp fold. Open the sheet and fold at the 2nd score line, create a crisp fold and apply glue to this section. Take the shortest of our 5 pages (the 3½" x 5¼) and stick it to the fold.
Step 6.
Open the sheet again and fold at the 3rd score line, create a crisp fold and apply glue to this section. Take the 4" x 5¼ page and stick it to the fold.
Repeat Step 6. for the remaining 3 pages.
Step 7
Open up the page slider (the pages should be underneath) Slip the slider under the strip and center the page lot onto the back cover. Take some double sided tape and stick it on to the strip.
Step 8
When the slider and pages are centered then close the album sticking the slider to the top of the strip and stick it down good.
Test your album opens ok by pulling on the pull out tab and decorate.
Thursday, 22 April 2010
I'm Back
After a long absense I am back with a vengence. I will be uploading a lot of photo's of the cards and creations I have made in the last 4 months.
Bianca is growing quickly and now that she is a little less demanding I can get to crafting and blogging. I will also be taking up some online challenges and try post at least 3 to 4 times per week. I will also be uploading the tutorials and tips and advise promised earlier.
Bianca is growing quickly and now that she is a little less demanding I can get to crafting and blogging. I will also be taking up some online challenges and try post at least 3 to 4 times per week. I will also be uploading the tutorials and tips and advise promised earlier.
Tuesday, 13 April 2010
Graphics on my Blog
Thanks to Ingrid at http://cute-bloglayouts.blogspot.com for the lovely graphics.
Friday, 29 January 2010
Magic-boxes
For all of you who have been admiring the Magic Boxes on Create & Craft and in the MAKING GIFTS magazine have a look at Eliane's site. She is the original creator of these little beauties. You can see her website and gallery or follow her blog to see more of her wonderful creations. The stamps and goodies she use to make these are all available in her shop. I have bought quite a few of the stampsets and have to say they are excelletn quality and the customer service I got from them was brilliant as well.
There is also a tutorial for a Small Butterfly Box and how to create a 3D Flower.
There is also a tutorial for a Small Butterfly Box and how to create a 3D Flower.
Wednesday, 25 November 2009
Advise on choosing colours
It does not matter what type of projects you do colour is all around us and choosing the right colours can be a challenge.
Here is a nice site that gives you a lot of useful info on colour and the effects it has on our day-to-day lives.
Other Useful links:
Colour Wheels
List of Crayola colours
Prismacolor Tutorial
Other Coloure Pencil Tutorials
Here is a nice site that gives you a lot of useful info on colour and the effects it has on our day-to-day lives.
Other Useful links:
Colour Wheels
List of Crayola colours
Prismacolor Tutorial
Other Coloure Pencil Tutorials
Monday, 2 November 2009
Goodies for sell
I have had a few request to ship things abroad, I am afraid I can not do this due to the Shipping costs and also the fact that Royal Mail is on strike again:0
Saturday, 31 October 2009
Quilling Tutorials
Quilling or paper filigree is the art of rolling thin strips of paper into different shapes and using the shapes to form designs. Quilling has been around since the Renaissance age, but I was only recently introduced to it. This is just the basics and more info will be added later with links to site with free patterns and galleries.
Tools
The tools needed for this craft are very basic. Paper strips, something to wind the strips around and glue are basically all you need to get started. Paper comes in many different weights. You select the weight according to what you want your finished design to look like. The strips of paper are usually cut anywhere from 1/8" to 1" wide with 1/8" being the standard. In the examples I used ordinary construction paper cut into 1/8" strips. I used a toothpick to wind the coils, but some prefer needles, pins, hat pins or some specially designed tools for quilling. Ordinary clear-drying white glue is good for most projects. If you are using a paper that has been sprayed with metallic paint, a heavier clear-drying glue may be used.
Other tools that may be helpful
Scissors for cutting the strips of paper, although you can purchase pre-cut strips of paper for quilling in some craft stores.
A small plastic cap or plastic bottle to hold a few drops of glue so the rest of the bottle won't dry out.
A ruler is used to achieve uniformity in the size of the pieces.
You can use a piece of corrugated cardboard covered with waxed paper as a work board. A pattern can be slipped between the cardboard and the wax paper and if glue gets onto the wax paper it can easily be peeled off. Another alternative is styrofoam covered with plastic wrap.
Tweezers and a muffin tin are good to have handy for organizing by different size or shape and the tweezers will help you pick up or place the smaller pieces into position.
A damp sponge or washcloth is helpful to keep your fingers free of glue and to moisten the strip when you start a coil.
Basic Shapes Feelers Peacock Eye Contoured Peg Peg oll a strip of paper tightly and glue the end while the coil is still tight. Pegs can be used in the design or glued to the underside of another shape to raise it creating dimension. Quotes Open Heart Rectangle Triangle Closed Heart Have a look at Monica's blog for more in depth tutorials, video's and great ideas.
"V" Shape
Fold the strip in half and roll the ends on the outside of the paper, away from the inner crease.
Roll only a small part of the paper strip, leaving the rest of the strip straight. Feelers can be made with the strip folded in half as in this example, or just with one coil from an unfolded strip.
This can be made from either a loose or tight coil. After the coil is made pinch one side. A petal can be formed by bending the tip of the peacock eye slightly to one side.
After rolling a tight coil, push the peg up from underneath the center to contour it's shape. Used to add dimension to a design.
Fold the strip in half, roll the ends in the same direction. One coil will be rolled toward the center crease, the other away from it.
Fold the strip of paper in half and roll the ends toward the center of the crease.
Tendril (Note this got smashed in the scanner it should be open and springy looking)
Roll in a spiral shape around the toothpick as tight as desired, also known as a spiral, rope or twist.
"S" Shape
Roll from both ends of the paper but on opposite sides of the strip.
Diamond
Made from either a loose or tight coil. After the coil is made pinch two opposite sides. Also called a marquis or an eye-shaped coil.
Leaf Shape
If you bend one or more ends of the diamond, you form a leaf shape.
Oval
Squeeze a loose coil into an oval shape, but try not to point the ends.
Square
Roll a loose coil and form a diamond. Pinch the smooth sides into points forming a square.
Squeeze first into an oval then pinch the corners to form a rectangle.
Star of Leaf Shape
Form a diamond first. Grasping the ends push in toward the center forming two newer points with a curve between them.
Pinch a loose coil into a 3-sided shape. Usually this looks better if you keep the center a round as possible.
Pinch a triangle, then push in one side to form an indent.
Half Moon
Pinch a loose coil on two sides while placing your finger in the middle of one side, this will cause an indentation on that side.
Tulip
Pinch a loose coil on two sides while pushing in toward the center at one side.
I have tried so many different techniques over the years and always give each one a fair change. I love the finished effect but find quilling something a bit to fiddley when you have a 5 year old running around. I do use it from time to time for specific projects and when I do I will post Photo's. Hope this helps you and maybe introduce you to another fun and easy way to create lovely layouts for both your cards and scrapbook pages.


Friday, 25 September 2009
Techniques and tutorials to look forward to
I will be posting information on the following techniques over the next few weeks. Tutorials and projects will follow by the end of next month when my maternity leave start and I have some more time to make the projects and take photo's. So if you have or know about a blog or website that specialize in any one of these let me know and I will add a link to it in that specific section
Stamping
Decoupage
Die Cutting
Embossing
Iris Folding
Quiling
Spirelli
Tea Bag Folding
Paper Pricking
Lace
Peel Offs
Scrapbooking
Using Sketches for both Card Making and Scrapbooking.
Making the most of your craft CD's
Stamping
Decoupage
Die Cutting
Embossing
Iris Folding
Quiling
Spirelli
Tea Bag Folding
Paper Pricking
Lace
Peel Offs
Scrapbooking
Using Sketches for both Card Making and Scrapbooking.
Making the most of your craft CD's
Choosing Adhesives
Please note this list is not complete and many more adhesive products are available. Adhesives, or glues, are an essential component of paper craft. Choosing and using the correct adhesive for the job in hand is vitally important to achieve the correct result. Different types of adhesive are required for particular purposes, no one adhesive does the job for all sticking requirements. In many cases adhesive choice comes down to personal preference. I will be adding Pictures and links to this later.
To cover all your crafting needs, you will need, one adhesive from each of the groups below
Dry adhesives
This group of adhesives are a craft box must have as they are quick and easy to use, nonmessy and in most, cases, give an instant bond like :
Double-sided tape
tape on a roll that is sticky on both sides. Available in different widths. Great for sticking card and paper, quickly and easy to use
Glue dispensers
glue on a roll inside plastic casing with a rolling dispenser at one end. The snail or mouse shaped dispenser is simply glided along paper/card and the glue is laid onto the paper/card. Good alternative to double-sided tape. Available in permanent and repositionable format
Dots of glue
sticky circles, in various sizes on a carrier sheet or roll. Invaluable for sticking embellishments
Dimensional adhesives
Used to provide height and depth to papercraft projects. Perhaps most commonly associated with 3D decoupage but often used to raise just one element off a card for instant dimension.
3D foam pads
small foam pads, in various, depths and sizes, sticky on the top and bottom. Provide an instant bond
Silicone glue
glue in a tube that is squeezed out and applied to the back of work before applying to project. Silicone glue requires drying time but this can be advantages in decoupage as it provides time to move and shape layers.
Wet glue
Most of us will be familiar with PVA and “white glue” as it is often used in schools! This type of glue requires drying time and gives a strong bond.
PVA
available in tubes, often with a fine tip nozzle for precision application. PVA has a multitude of uses including as a varnish when watered down. Water based and dries clear
Glue stick
traditional glue, often used by children. Available in a solid, stick format that you twist up to use. This type of glue is, generally not as strong as liquid glue; suitable for card and paper
Glue pen
wet glue in a pen format, allowing precise application. Generally glue is blue, so that you can see where applying it and dries clear. Stick items when glue is wet and blue for an instant bond or when glue is tacky and clear for repositionable use. Great for sticking small embellishments such as flat backed gems.
Things to consider
Check adhesives used for scrapbooking are acid free. Always read instructions and follow safety Do you want an instant bond or time to reposition work?
Working with children? Make sure the adhesive is suitable – non toxic, washable etc
Take time to consider what you a re doing and which type of adhesive is most suitable
for the project.
Hints & tips
• Always replace lids to stop glue drying out, blocking nozzles and accidental spills
• For precision application of wet glue use a cocktail stick to apply to project
• Use PVA sparingly on paper/card as it will wrinkle paper/card as it dries
• Consider the decorative potential of adhesives – glitter sprinkled over double-sided tape or dots of glue, for example!
• Ask other crafters and demonstrators which adhesive they use if you are still not sure
To cover all your crafting needs, you will need, one adhesive from each of the groups below
Dry adhesives
This group of adhesives are a craft box must have as they are quick and easy to use, nonmessy and in most, cases, give an instant bond like :
Double-sided tape
tape on a roll that is sticky on both sides. Available in different widths. Great for sticking card and paper, quickly and easy to use
Glue dispensers
glue on a roll inside plastic casing with a rolling dispenser at one end. The snail or mouse shaped dispenser is simply glided along paper/card and the glue is laid onto the paper/card. Good alternative to double-sided tape. Available in permanent and repositionable format
Dots of glue
sticky circles, in various sizes on a carrier sheet or roll. Invaluable for sticking embellishments
Dimensional adhesives
Used to provide height and depth to papercraft projects. Perhaps most commonly associated with 3D decoupage but often used to raise just one element off a card for instant dimension.
3D foam pads
small foam pads, in various, depths and sizes, sticky on the top and bottom. Provide an instant bond
Silicone glue
glue in a tube that is squeezed out and applied to the back of work before applying to project. Silicone glue requires drying time but this can be advantages in decoupage as it provides time to move and shape layers.
Wet glue
Most of us will be familiar with PVA and “white glue” as it is often used in schools! This type of glue requires drying time and gives a strong bond.
PVA
available in tubes, often with a fine tip nozzle for precision application. PVA has a multitude of uses including as a varnish when watered down. Water based and dries clear
Glue stick
traditional glue, often used by children. Available in a solid, stick format that you twist up to use. This type of glue is, generally not as strong as liquid glue; suitable for card and paper
Glue pen
wet glue in a pen format, allowing precise application. Generally glue is blue, so that you can see where applying it and dries clear. Stick items when glue is wet and blue for an instant bond or when glue is tacky and clear for repositionable use. Great for sticking small embellishments such as flat backed gems.
Things to consider
Check adhesives used for scrapbooking are acid free. Always read instructions and follow safety Do you want an instant bond or time to reposition work?
Working with children? Make sure the adhesive is suitable – non toxic, washable etc
Take time to consider what you a re doing and which type of adhesive is most suitable
for the project.
Hints & tips
• Always replace lids to stop glue drying out, blocking nozzles and accidental spills
• For precision application of wet glue use a cocktail stick to apply to project
• Use PVA sparingly on paper/card as it will wrinkle paper/card as it dries
• Consider the decorative potential of adhesives – glitter sprinkled over double-sided tape or dots of glue, for example!
• Ask other crafters and demonstrators which adhesive they use if you are still not sure
Craft Glossary
Here is a quick list of explanation of all the crafting terms you hear so often. it is a work in porgress and as I get new one I will expand the list, feel free to email me any you can not find on the list but feel you would like to share.
Craft Glossary
Acid-free
card, paper and other products that do not contain acid (or have a low ph value) This is important in scrapbooking as acid degrades pictures over time see "lingin-free”
Aperture
a window cut into the front of a card blank. Apertures are available in
many different shapes. Cards can be bought with pre-cut apertures or you can cut
your own
Brads
recognised as the humble paper fastener! Brads have a small head and two metal pins that are pushed through paper/card. The pins are opened to hold in place. Brads are available in a huge array of sizes, colours and shapes.
Card blank
Pre-folded card in, generally in standard sizes, ready to decorate and embellish
Cardstock
essential basic card used to make card blanks, matting and layering, die-cutting etc
Crop
group of scrapbookers working on layouts together and sharing ideas
Cropping
trimming a photograph to size or to focus on a particular area
Deckle edge
an irregular, patterned shape. Popular edging for card blanks. Decorative edged scissors – scissors that cut creating a shaped edge, perhaps,most commonly known is deckle edge but many patterns are now available see “deckle edge”
Decoupage (also 3D decoupage)
traditionally the art of layering images and heavily varnishing. Today, better known as 3D decoupage were different aspects of repeat images are cut out and layered on top of each other using dimensional adhesive
De-bossed
the opposite of “embossed”. When an image is indented rather than raised see mbossed”
Die-cuts
pre-cut decorative shapes cut out using a machine. Die-cutting machines and dies are available to buy to die-cut shapes yourself or packs of die-cut shapes can be bought. See “die cutting”
Die-cutting
using a machine to cut shapes. A metal die is run through a machine with the medium to be cut and creates a shape. see “die-cuts”
Dimensional glaze/adhesive
clear varnish which can also be used stick and glaze items. Dries to a high gloss, hard finish
Dry embossing
creating a raised image on paper or card using a stencil and embossing tool. Pressure is applied to the paper or card, through the stencil using an embossing tool creating a raised image on the reverse side of the paper or card see “embossing”
Embellishments
anything that is used to decorate a card! The term covers a wide range of items, usually non-paper, from brads to charms, eyelets to beads. Embellishments can be bought, handmade or found items, never ending really!
Embossing
creating a raised image on paper or card see “dry embossing” and “heat embossing”
Embossing tool
a tool that looks like a pen with metal balls at either end. Used for dry embossing and creasing of paper and card see “embossing” and “dry embossing”.
Heat embossing
creating a raised image on paper or card using a rubber stamp,embossing ink, embossing powder and a heat gun. An image is stamped, sprinkled with powder and heated with a heat gun until the powder melts creating a raised,shiny outline see “embossing”
Heat gun (or heat tool)
a specialist tool that safely delivers very hot air but with very little blow so that embossing powder can be melted and not blown away see “heat embossing”
Lace
from the French word meaning “linked together”. Card is cut using a template and folded to create interlaced design
Layering
sticking one piece of card on to another, leaving a narrow border all around to frame the top layer. More than one layer is often used and called matting and layering see “matting”
Lignin-free
card, paper and related products that do not contain lignin. Lignin is found in trees and therefore only associated with paper products. This is important in scrapbooking as products that contain lignin age over time see “acid free”
Matting
sticking one piece of card on to another, leaving a narrow border all around to frame the top layer. More than one layer is often used and called matting and layering see “layering”
Peel-off
a type of sticker, commonly an outline image that you simply “peel off” a backing paper and stick. Adds instant “embossed” effects to projects see “embossing”
Quilling
the rolling, pinching, gluing and shaping of narrow lengths of paper to create decorative shapes. These shapes are then grouped together to create motifs
Rub-ons – or rub downs!
Quick and easy to use images that come on a carrier sheet. Place transfer motif onto surface and rub over top with the supplied stick to transfer image to chosen surface
Spirelli
the technique of winding thread around a notched shape to create a pattern
Stamps
images formed in rubber or clear polymer that are inked and pressed onto card or paper to create instant images, that can them be coloured
Template
pre-prepared cut out shape that you use to trace or cut identical shapes from. Usually made from heavy duty material so that template can be used over and over again
Vellum
a beautiful, translucent type of paper. Available in many colours, plain or printed
Craft Glossary
Acid-free
card, paper and other products that do not contain acid (or have a low ph value) This is important in scrapbooking as acid degrades pictures over time see "lingin-free”
Aperture
a window cut into the front of a card blank. Apertures are available in
many different shapes. Cards can be bought with pre-cut apertures or you can cut
your own
Brads
recognised as the humble paper fastener! Brads have a small head and two metal pins that are pushed through paper/card. The pins are opened to hold in place. Brads are available in a huge array of sizes, colours and shapes.
Card blank
Pre-folded card in, generally in standard sizes, ready to decorate and embellish
Cardstock
essential basic card used to make card blanks, matting and layering, die-cutting etc
Crop
group of scrapbookers working on layouts together and sharing ideas
Cropping
trimming a photograph to size or to focus on a particular area
Deckle edge
an irregular, patterned shape. Popular edging for card blanks. Decorative edged scissors – scissors that cut creating a shaped edge, perhaps,most commonly known is deckle edge but many patterns are now available see “deckle edge”
Decoupage (also 3D decoupage)
traditionally the art of layering images and heavily varnishing. Today, better known as 3D decoupage were different aspects of repeat images are cut out and layered on top of each other using dimensional adhesive
De-bossed
the opposite of “embossed”. When an image is indented rather than raised see mbossed”
Die-cuts
pre-cut decorative shapes cut out using a machine. Die-cutting machines and dies are available to buy to die-cut shapes yourself or packs of die-cut shapes can be bought. See “die cutting”
Die-cutting
using a machine to cut shapes. A metal die is run through a machine with the medium to be cut and creates a shape. see “die-cuts”
Dimensional glaze/adhesive
clear varnish which can also be used stick and glaze items. Dries to a high gloss, hard finish
Dry embossing
creating a raised image on paper or card using a stencil and embossing tool. Pressure is applied to the paper or card, through the stencil using an embossing tool creating a raised image on the reverse side of the paper or card see “embossing”
Embellishments
anything that is used to decorate a card! The term covers a wide range of items, usually non-paper, from brads to charms, eyelets to beads. Embellishments can be bought, handmade or found items, never ending really!
Embossing
creating a raised image on paper or card see “dry embossing” and “heat embossing”
Embossing tool
a tool that looks like a pen with metal balls at either end. Used for dry embossing and creasing of paper and card see “embossing” and “dry embossing”.
Heat embossing
creating a raised image on paper or card using a rubber stamp,embossing ink, embossing powder and a heat gun. An image is stamped, sprinkled with powder and heated with a heat gun until the powder melts creating a raised,shiny outline see “embossing”
Heat gun (or heat tool)
a specialist tool that safely delivers very hot air but with very little blow so that embossing powder can be melted and not blown away see “heat embossing”
Lace
from the French word meaning “linked together”. Card is cut using a template and folded to create interlaced design
Layering
sticking one piece of card on to another, leaving a narrow border all around to frame the top layer. More than one layer is often used and called matting and layering see “matting”
Lignin-free
card, paper and related products that do not contain lignin. Lignin is found in trees and therefore only associated with paper products. This is important in scrapbooking as products that contain lignin age over time see “acid free”
Matting
sticking one piece of card on to another, leaving a narrow border all around to frame the top layer. More than one layer is often used and called matting and layering see “layering”
Peel-off
a type of sticker, commonly an outline image that you simply “peel off” a backing paper and stick. Adds instant “embossed” effects to projects see “embossing”
Quilling
the rolling, pinching, gluing and shaping of narrow lengths of paper to create decorative shapes. These shapes are then grouped together to create motifs
Rub-ons – or rub downs!
Quick and easy to use images that come on a carrier sheet. Place transfer motif onto surface and rub over top with the supplied stick to transfer image to chosen surface
Spirelli
the technique of winding thread around a notched shape to create a pattern
Stamps
images formed in rubber or clear polymer that are inked and pressed onto card or paper to create instant images, that can them be coloured
Template
pre-prepared cut out shape that you use to trace or cut identical shapes from. Usually made from heavy duty material so that template can be used over and over again
Vellum
a beautiful, translucent type of paper. Available in many colours, plain or printed
Saturday, 19 September 2009
Fiskars Butterfly Template 2
Here is some cards i made quite some time ago using the Fiskars shape cutter and Butterfly 2 template. It was great fun and I think looked pretty nice.


Subscribe to:
Posts (Atom)